


A step-by-step guide to knitting the gorgeous Lucy Cardigan
Ever gotten halfway through a project and thought “Hang on, am I even doing this right?” We have 🙋♀️
That’s why we’ve created these step-by-step guides to walk you through the knitting process.
Even if you've never knitted before, we'll take you from zero to knitting hero in no time 🦸♀️
When it comes to knitting, practice makes perfect
Before we get started on the pattern we suggest you spend a bit of time learning the basic stitches you’ll need to complete your masterpiece.
The Lucy Cardigan is a dream to knit up and is perfect for beginners. You'll want to be confident with the knit stitch and its friend the purl stitch before we start. We put the knit and purl stitches together to make a rib stitch and a stockinette stitch. You'll also want to get a hang of tying a slip knot and casting on your stitches which is the first step in any knitting project.
You can use the yarn that came in your kit to practice with. Once you've got these mastered you'll find the pattern a cinch!
Total beginner? 👩🏫
For a more comprehensive lesson on the basics of knitting visit our Learn How To Knit page.
Onto the Cardigan!
⚡️What you'll need
Your kit comes with everything you'll need to make your masterpiece. In your kit you'll find;
- 10mm and 12mm needles
- 5 to 7 balls of Cardigang Chunky Merino Wool
- A darning needle
- Made by me tag
You also want to have a pair of scissors handy.
📏 Sizing and measurements
You can make your Lucy Cardi in 5 sizes.
| SIZE |
MEASUREMENTS (laying flat) |
| 6-8 | 55cm wide x 43.5cm high |
| 10-12 | 60cm wide x 47cm high |
| 14-16 | 65cm wide x 49cm high |
| 18-20 | 70cm wide x 52.5cm high |
| 22-24 | 75cm wide x 54.5cm high |
Your pattern is read like this; 6-8 (10-12, 14-16, 18-20, 22-24). Make sure you're following the correct instructions for your size.
🥣 Test your tension
Before you start your project, make sure your tension (how tightly or loosely your knitting is) is juuuust right. We do this by knitting a “tension swatch”. It's a bit like goldilocks, if the tension is too tight, your piece will be too small, and if it's too loose it may not hold its shape and might be too big.
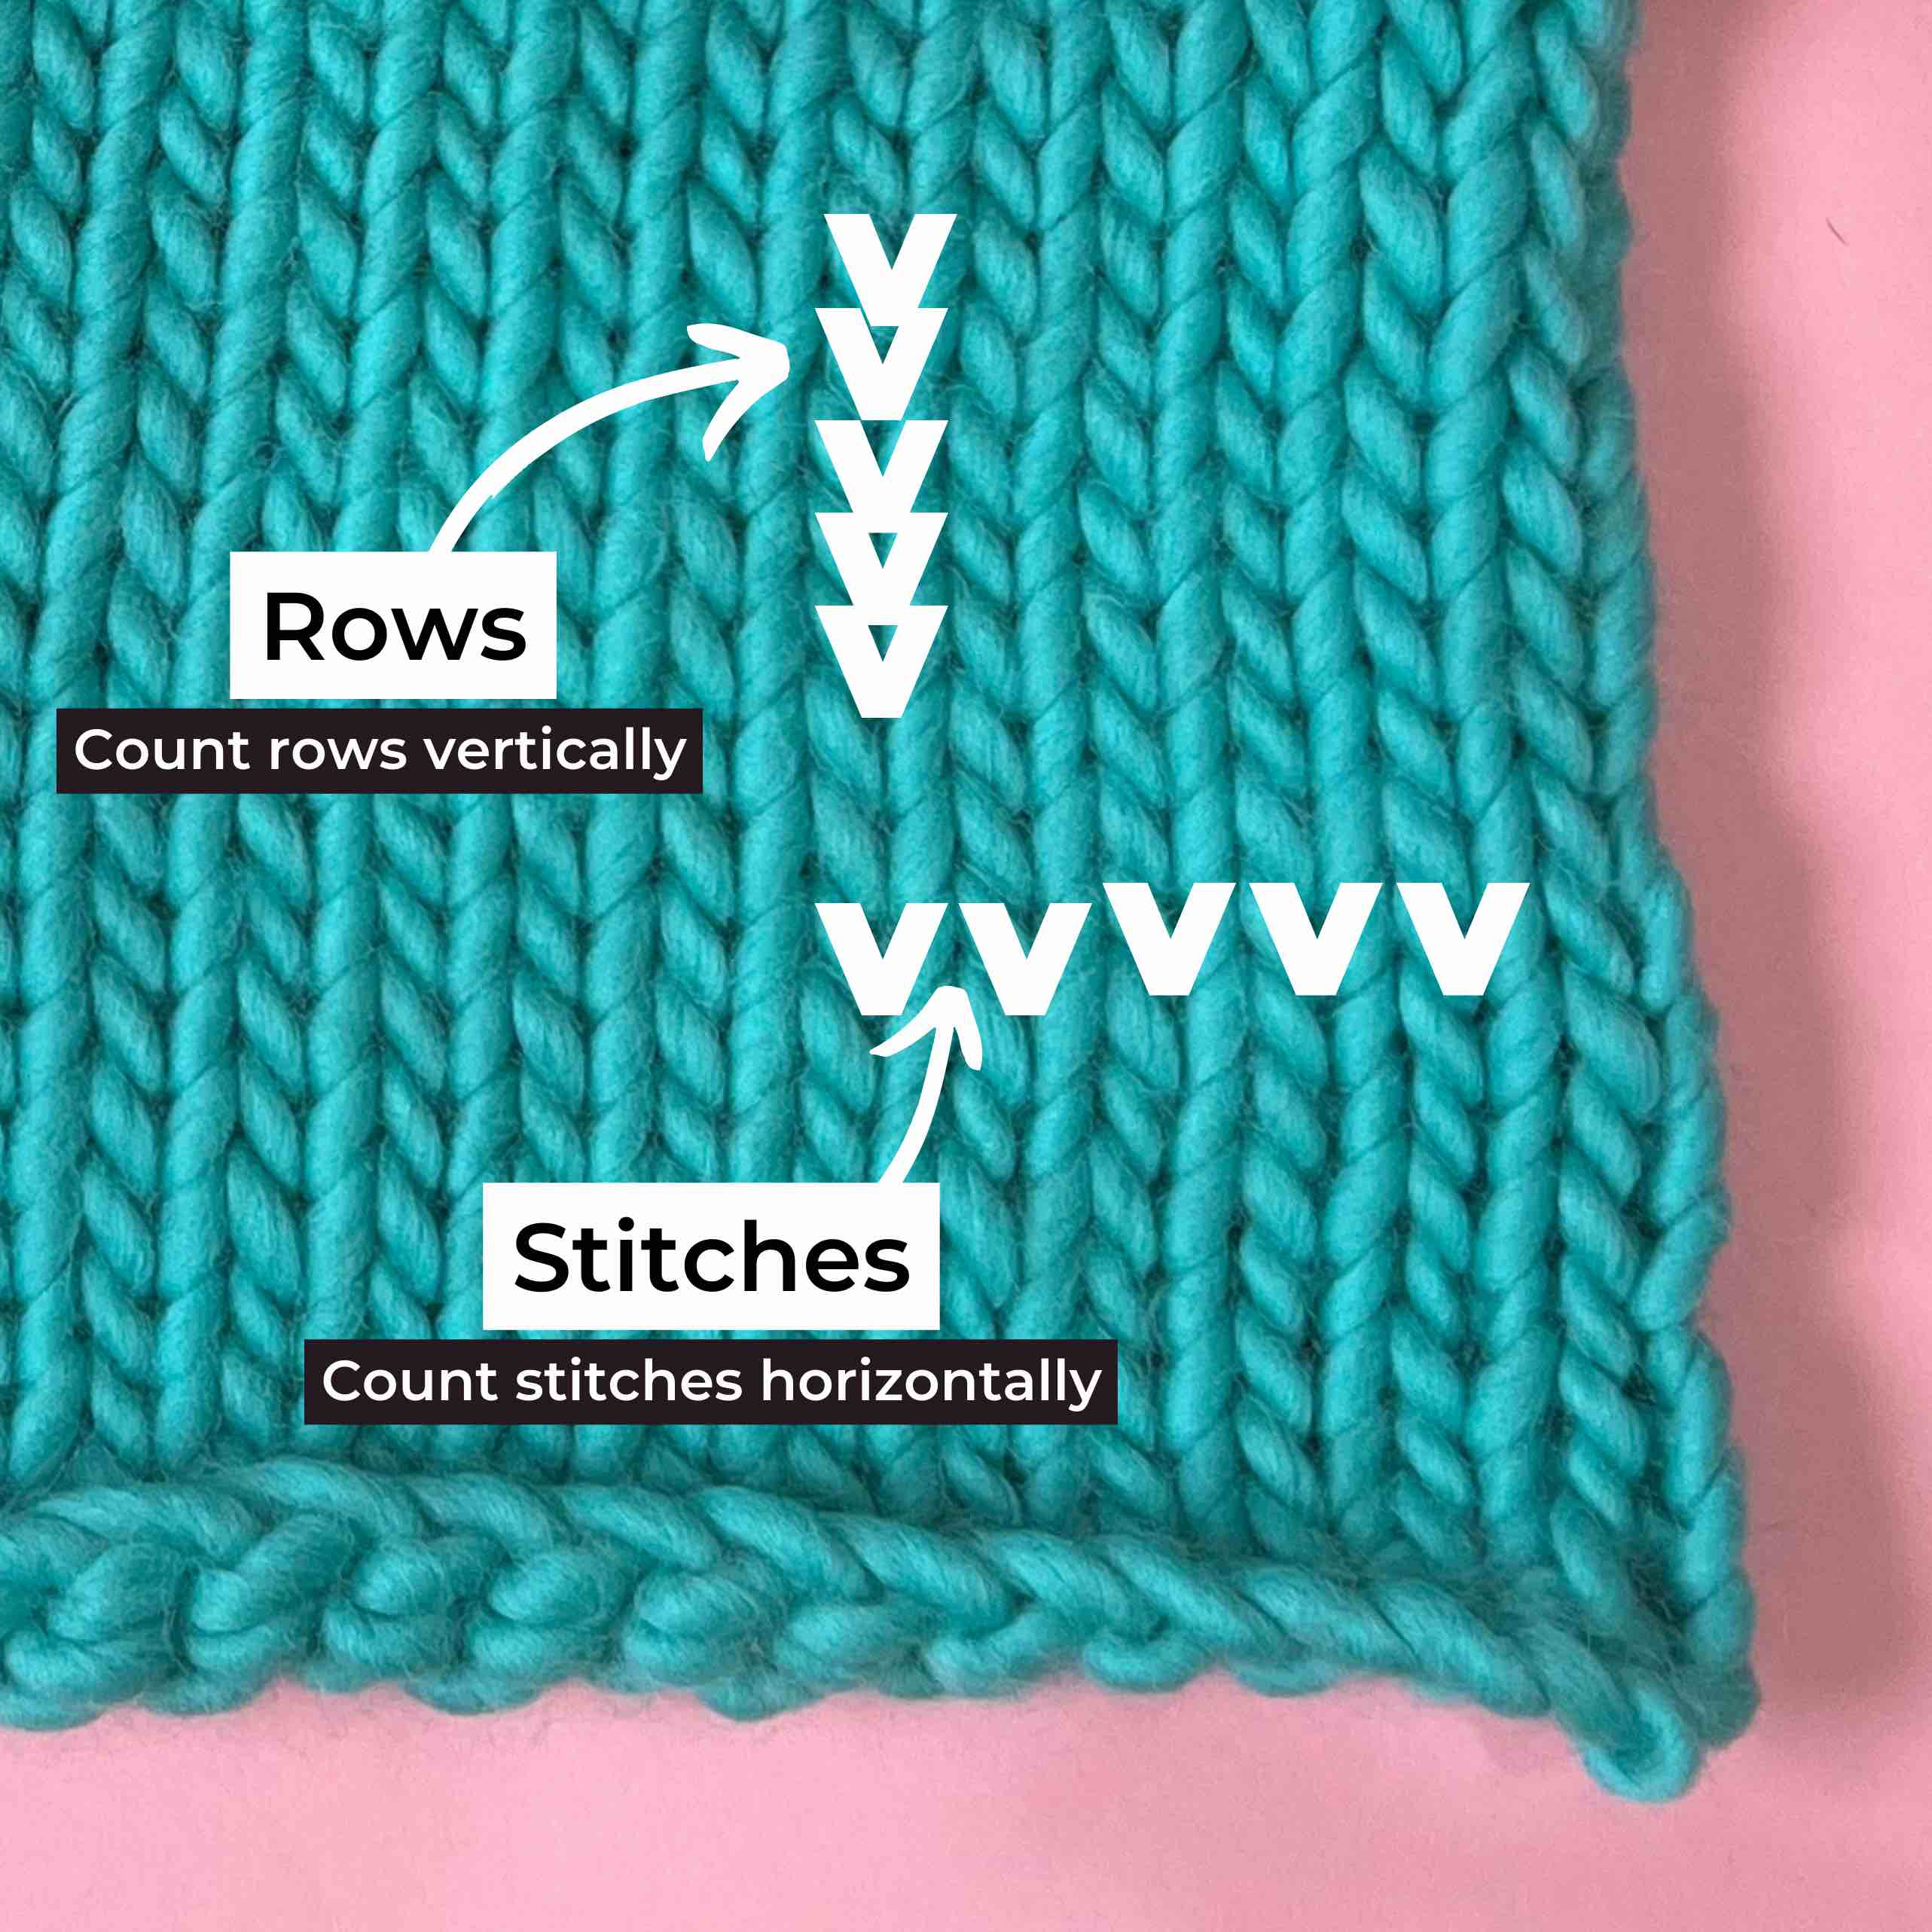
Gauge: If done correctly, your 10x10cm knitted swatch should be 8 stitches wide and 11 rows high when knitted in stockinette stitch on your 12mm needles.
To test this, jump on your needles - use the yarn and needles that came in your kit. Cast on around 14 stitches, then knit in stockinette stitch (knit all stitches in your first row, purl all stitches in the next - repeat) for around 14 rows. Then measure a 10x10cm square and count your stitches and rows within that space to make sure you're knitting at the correct tension.
If you've got more stitches or rows than the instructions say you should have, your knitting is a little too tight, and if you've got less your knitting is too loose. Adjust your tension by holding the yarn a little more tightly/loosely as you knit.
💡 We know knitting a tension swatch can seem like a bit of a drain, but it's really important because the difference of a few millimetres in your tension can lead to a finished piece this is quite different in size to what you intended.
🧶 Let's knit up a storm!
Time to get click-clacking and whip up your cosy cardigan.
Remember learning a new skill can be a little challenging at first, and you’re bound to find yourself making some mistakes along the way. But as with learning anything, your brain and your hands slowly start to get the hang of it, muscle memory is created, and soon the thing you found tricky/daunting/scary is like second nature! 💪
SLEEVES
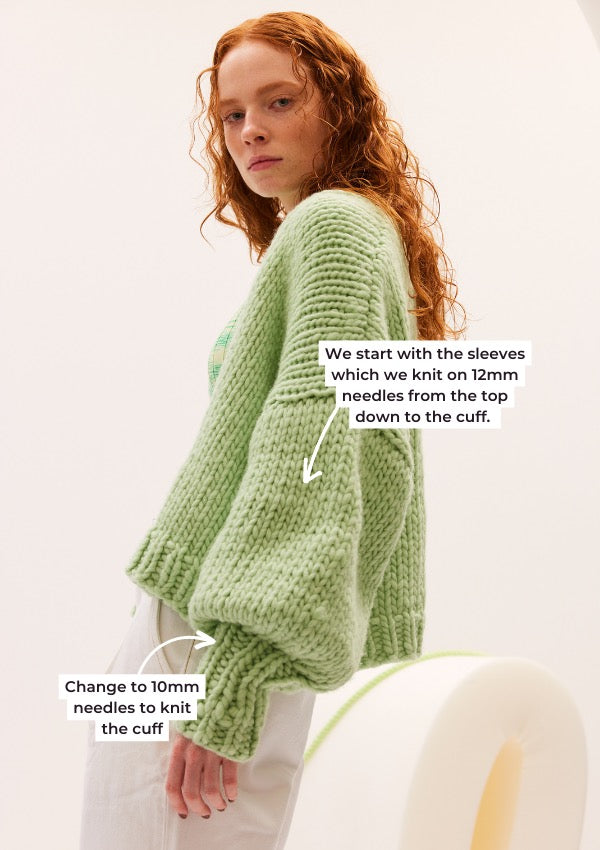
We start with the sleeves which we knit flat from the top down. When we get to steps 3 and 4 we will decrease some stitches and then knit our cuffs in rib stitch. You'll need two sleeves so follow the instructions twice! ✌️
Step 1:
Cast on the required number of stitches using your 12mm needles.
Your needles will be connected by a tube, that's just so they can be used to knit 'in the round'. We're knitting flat (nothing complicated here!) so just treat them as straight needles and it's totally fine that your stitches run down onto the tubing.
Hot tip: your piece will 'grow' as you knit so don't be alarmed if it looks like you're knitting a baby's sleeve to start with!
Step 2:
We're going to knit our sleeves in stockinette stitch which is where we knit one row, then purl the next. Knit the specified number of rows (this will be different depending on the size you're making).
Step 3-4:
To get the shape in our sleeve, we're going to decrease some stitches before we knit the cuff. We do this over 2 rows and by knitting/purling two stitches together at points.
📹 Watch How To Knit Two Stitches Together
Step 5:
Next, we switch to using our 10mm needles to knit the cuff of our sleeves.
💭 To switch to a different size needle we just hold the new needle (in this case the 10mm needle) in our right hand and the current needle with your work on it in your left hand. Then knit the stitches from your left needle onto the new needle in your right hand.
We’ll work the allocated rows of 1x1 rib stitch. To create a rib we knit 1 stitch, then purl the next, then knit the next, then purl the next and repeat.
💭 Make sure you’re moving your yarn tail from the back to the front of your work between each stitch (bring the yarn in through the middle of the needles) to ensure the rib is executed correctly.
Step 6:
Cast off your stitches!
When you've got just one stitch left on your right needle, simply cut your yarn from the ball (leaving about 20cm) and thread it back through your last stitch to secure it
Hot tip: cast off your stitches nice and loosely so that you can fit your hand through the sleeve hole!
BACK
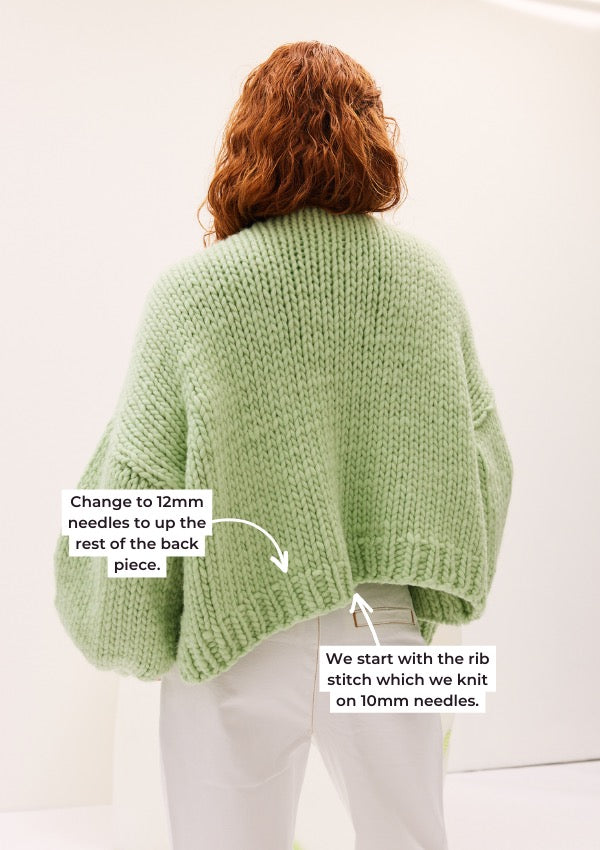
Onto the back! We knit our back piece from the bottom up. It's the biggest piece of your cardigan so strap in!
Step 1:
Using your 10mm needles cast on the correct number of stitches.
Step 2:
Knit the allocated number of rows of 1x1 rib stitch.
Step 3:
Change to your 12mm needles and we will knit up the rest of the back in stockinette stitch. Knit one row, purl the next.
Step 4:
Cast off your stitches. We're on the home straight now! Did somebody say wine time?! 🍷
FRONT PIECES
Time to knit up the front panels. We're going to knit 2 identical front panels so follow this part twice ✌️
Good news! The front panels are identical to the back in terms of techniques. So simply follow the pattern through.
Step 2:
When knitting the rib of our front panels, note the difference in sequence across sizes.
With a rib stitch, it's important that your knit stitches and your purl stitches line up on top of each other - that's what gives the fabric a stretch. If you've got an uneven number of stitches on your needle (like we do with sizes 18-24) we need to alter the sequence to ensure we're still stacking our stitches.
SEWING IT TOGETHER
We're SO CLOSE! I can see the finish line 🎢🙌
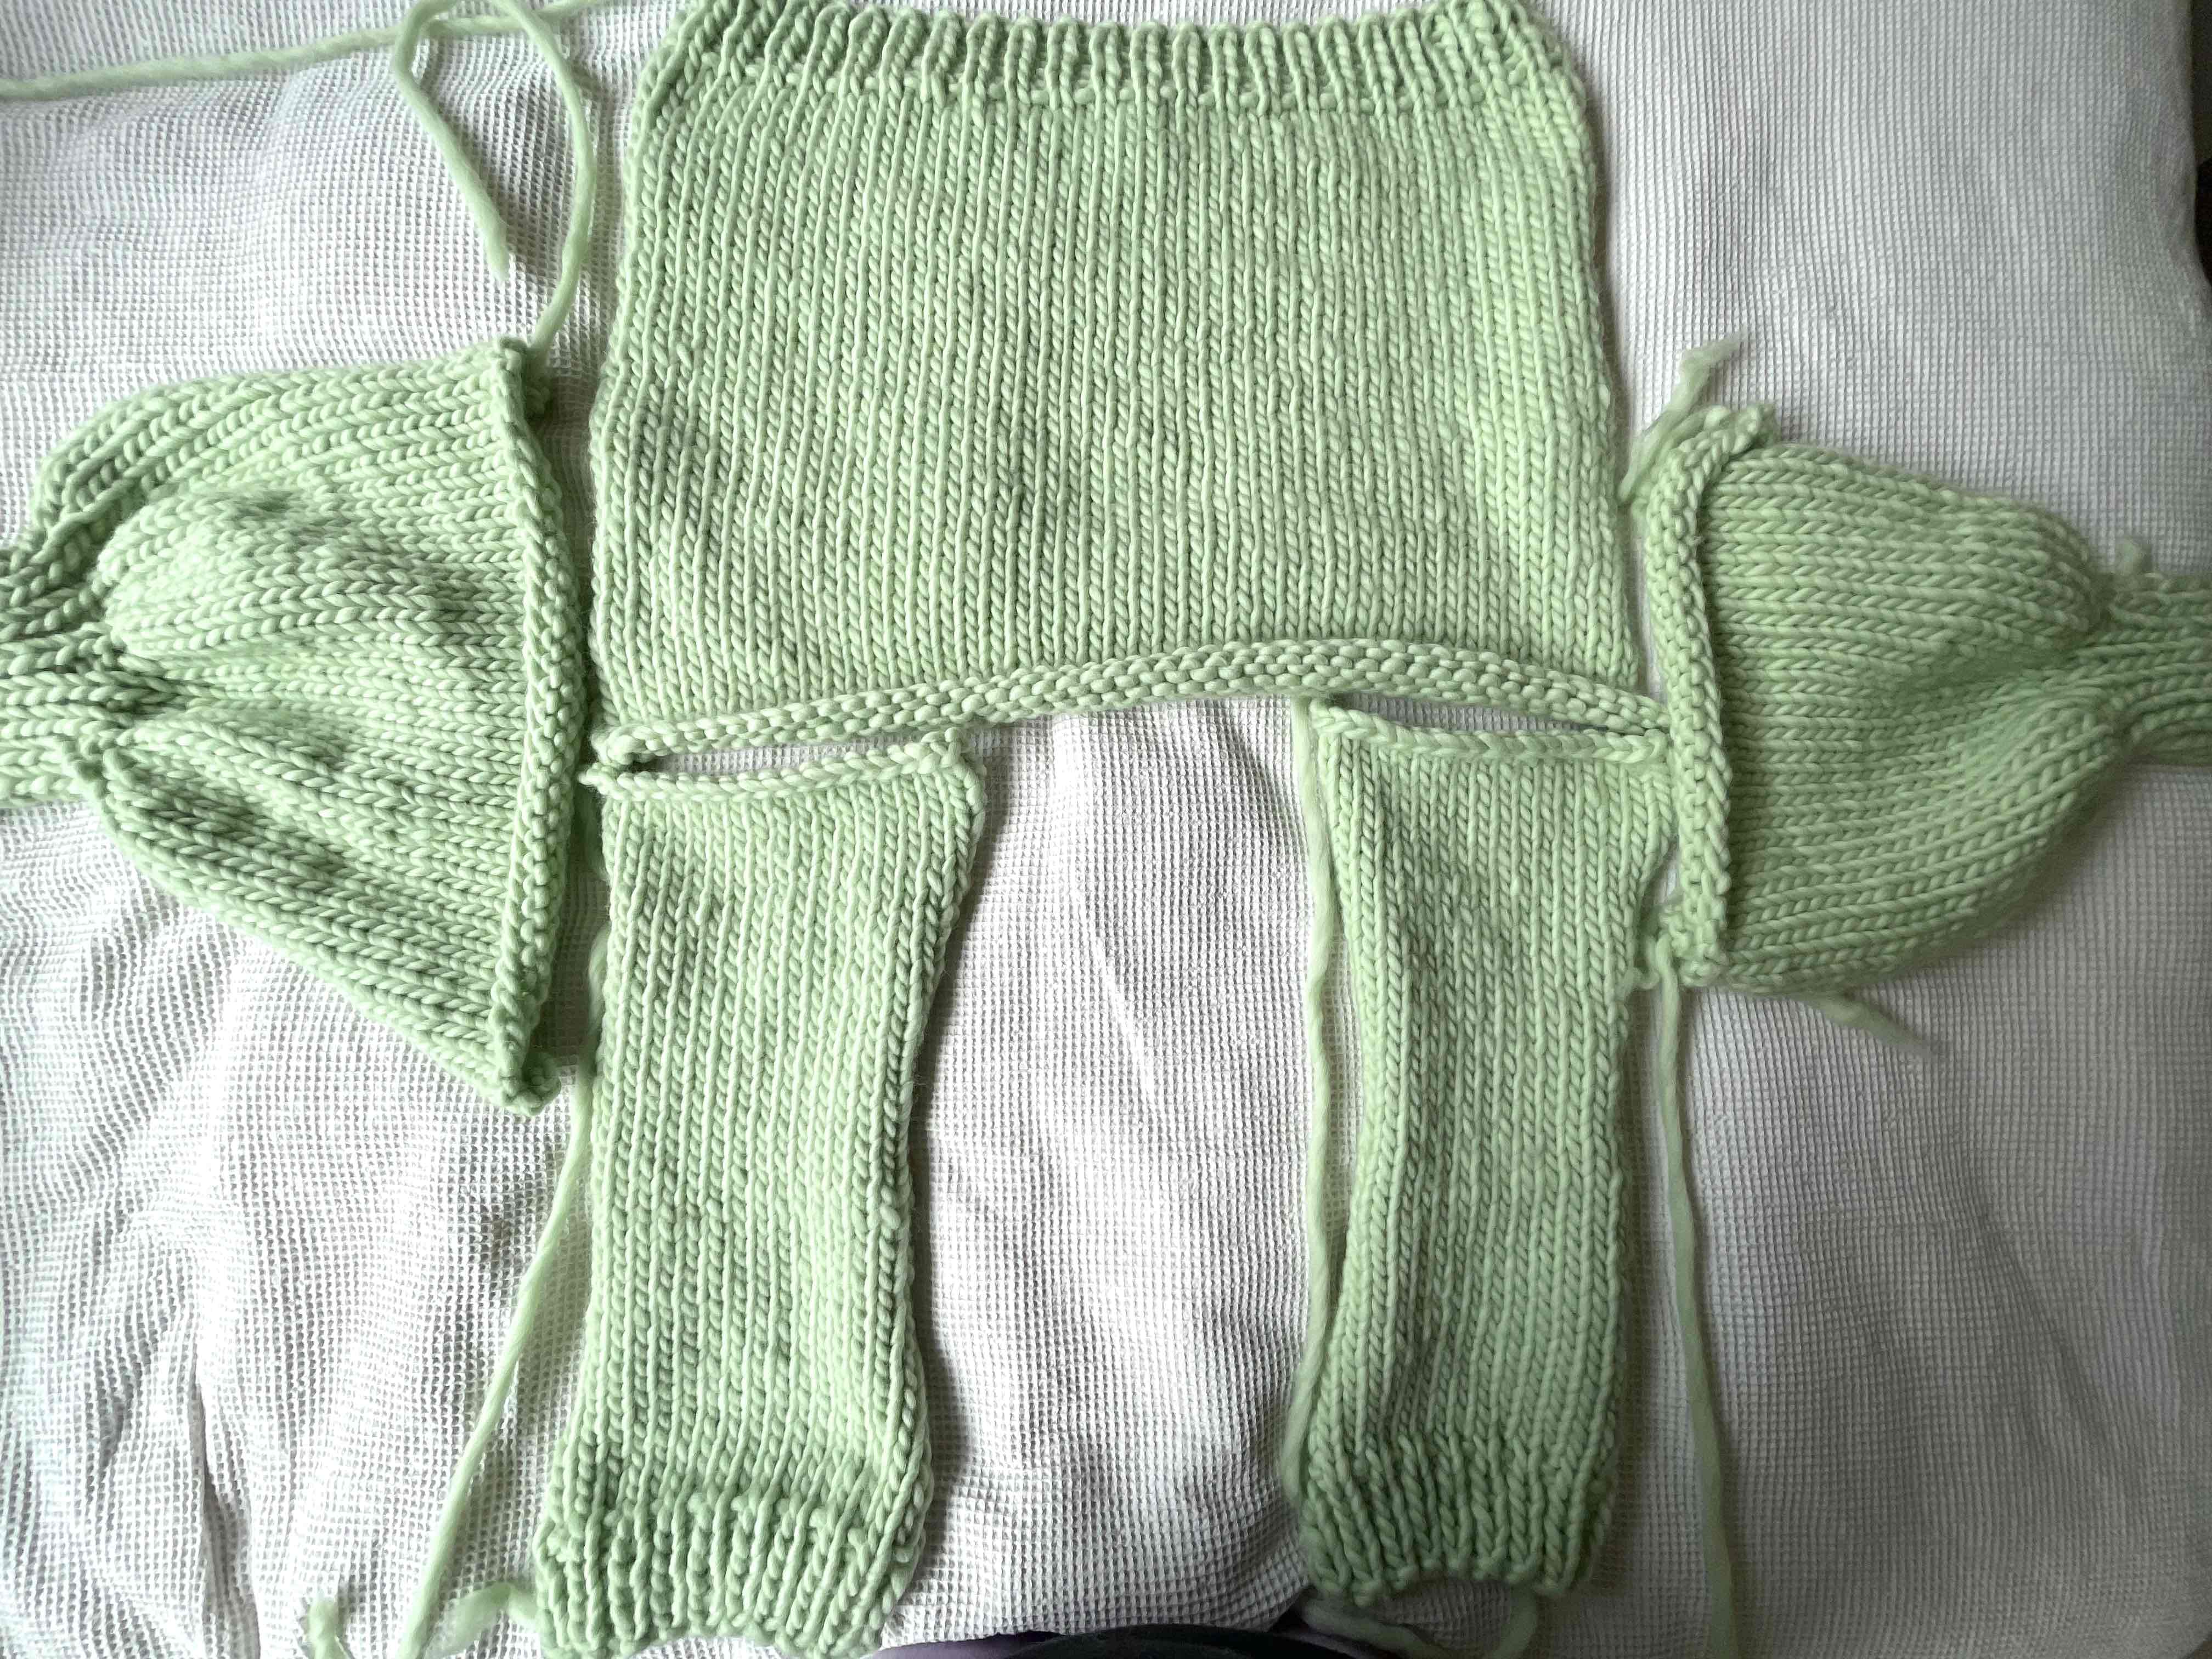
Now it’s time to get to work with the darning needle to sew your masterpiece together. We lay our pieces flat and sew them together one by one.
Step 1:
Lay your front and back pieces on a flat surface, the right sides facing you.
Step 2:
Then sew the cast-off edges of the front panels and the back panel together, leaving the gap in the middle for the open front of the cardi. It's best if you work from the edge of the piece and sew inwards.
We use a technique called the invisible seam technique which gives us a nice neat join. In the video below, we cover two variations of the technique - you can pick which you prefer!
Step 3:
Time to attach the sleeves to the body. Make sure the middle of your sleeve is lined up with the shoulder seam. This will ensure the seam of your sleeve is right under your armpit, not half way around your arm! Once you've made sure it's all lined up, sew the sleeves to the shoulders.
For this step and the next, we use a technique called mattress stitch. This technique is used when joining pieces vertically and it gives us a nice neat (almost) invisible join. It's also a great technique to hide loose or sloppy edges! 😎
You work this seam through the “bars” of stockinette stitch or the “bumps” of garter stitch.
📹 Watch How To Sew A Vertical Invisible Seam
💭 If you're anything like us you might find seaming a bit of a pain and hard to make super neat. It's a common beginner challenge! The main principle with seaming is no matter what seaming method you use, be sure you are entering into the same place on each stitch along the seam. This consistency makes it harder to see the seam.
Step 4:
Fold your cardi in half long ways with the wrong sides facing each other, we're going to sew the sides together using the same mattress stitch technique.
Start either at the cuff of the sleeve or the rib of the waist and work your way to the armpit and then around to the other end.
💭 It's normal for the wool to get a bit shabby, so we recommend using a few pieces and tying them together underneath as you go!
FINISHING
The last thing we do for every piece is weave in the ends. That’s basically just tidying up the piece so all loose ends are trimmed down and tucked into the inside of your work. You use your darning need and weave those ends into the seams so they are nicely hidden away.
BLOCKING (OPTIONAL)
The final step in finishing a knitted piece is to block it. This step is optional and not all beginner knitters will block their work (we didn't! 🤣) but it can improve the overall shape and finish of your piece.
Blocking your knitting is a process where you wet your piece to set the finished size and even out the stitches.
You can choose to block your work before you seam it together, or after. If you block before seaming together you might get a better result with your seaming because the stitches will be more lined up.
Step 1
Soak your knit in cool water. You only need to let your piece sit in the water for a few minutes and make sure the full piece is completely wet.
Step 2
Remove your knit from the water and dry it off by rolling it in a towel. You want to get us much of the moisture out of the knit as possible at this point but be gentle! You don't want to stretch the knit.
Step 3
Transfer your damp knit to a flat surface to block it on. If you've got a blocking mat - great! otherwise a towel will work. The surface needs to be somewhere where your knit can lie flat and can stay there until it fully dries so that the shape sets properly. Make sure it's not a surface that can be easily damaged by having something wet sitting on it!
Step 4
Arrange your piece so the right side is facing up and the shape is as you'd like it. If you've got a measuring tape you can measure and adjust the piece so it's the correct size.
Step 5
Allow the knit to air dry - this can take a few days. You can also use a hair dryer to speed up the process, just use a light heat and don't concentrate the air in one spot.
D.O.N.E! You've finished your cardigan, well done! Epic work 🤩 If this was your first-ever knitting project or one of many, we hope you had a blast click-clacking and making your masterpiece 💥❤️
In a bind and need a little more help?
Email us at stitchup@cardigang.com.au and we'll be able to help! Whether you're just starting out, or you've got a specific question or problem (dropped a stitch, no stress!), we're here to get you out of a bind.