FAQS
GENERAL FAQS
Nope! Our kits are designed for everyone, including total beginners. We provide easy-to-follow instructions that guide you through every step, so you can create beautiful pieces even if you’ve never picked up needles or a hook before.
Each kit includes everything you need to complete your project: luxurious yarn, high-quality needles or hooks, a detailed pattern, and goodies like a "Made by me" tag and drawstring bag. Just add your enthusiasm and you're good to go!
Heck yes they do! Each kit comes with needles or a hook perfectly matched to your project — no guesswork, no drama. Whether it’s chunky bois for a snuggly cardi or something finer for a delicate blanket, we’ve got you covered. Just open the bag and start stitchin’. 🧶💥
The time it takes to complete a project depends on your pace and the specific kit. However, our beginner-friendly kits are designed to be completed quickly and easily, so you can start enjoying your cozy creation in no time.
We use three squishy, beginner-friendly yarns across our kits – each one chosen for its stitchability, softness, and serious wow-factor:
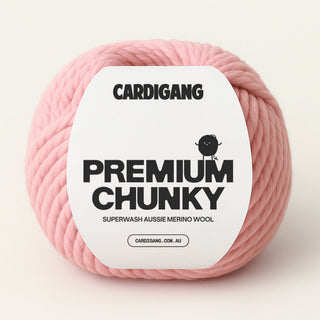
🧶 Premium Chunky – 100% Australian Merino wool with a thick, plush feel that knits up fast. It’s buttery-soft, warm, and perfect for pieces you want to show off (hello, stitch definition).
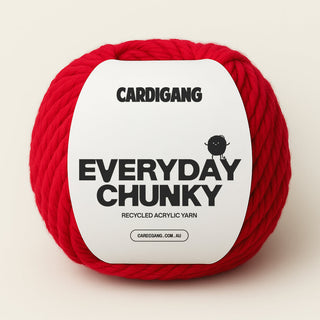
🧶 Everyday Chunky – A 50/50 blend of recycled and premium acrylic. She’s resilient, soft, and super forgiving – ideal for newbies who want a durable, feel-good yarn that’s a bit more budget-friendly.
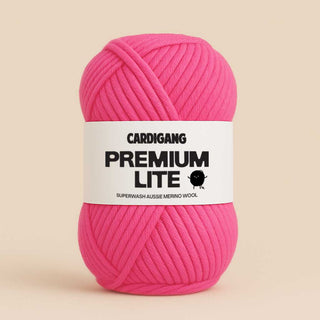
🧶 Premium Lite – Our newest gal! A finer 100% Australian Merino wool that’s light, elegant and perfect for drapey scarves, Parisian neck ties, or any project with a little more finesse. Think less chunky, more chic-y.
Each yarn is custom-dyed in our signature colourways and designed to help you create knits worth bragging about – no matter your skill level.
Absolutely! Our kits come in a range of delicious colors. When you order, you can customise the color to best suit your style and project.
So, here's the scoop on our colour situation. The colours you see on our website are the ones we've got available.
The best way to get a feel for the true colour is to check out the yarn page on our site (just jump to the menu and select 'YARN'). The images there will give you the most accurate representation of our current colour options.
We like to keep things fresh by switching up our colour ranges pretty regularly. This means that not every colour you see in our pictures is always in stock, but it also means there's always something new and exciting to discover.
If you're having trouble finding the exact shades you're after, or if you just want to chat more about colour options, don't hesitate to give us a shout.
You can view our general size guide here. Each pattern comes with more specific sizing and measurements which you can view on the product pages.
If you’re in between sizes or worried about the fit we recommend sizing up.
All our patterns come with measurements and instructions for all sizes so you can always size down if you decide to, but if you buy the larger size, you’ll have the right amount of yarn for either 📏😊
We don't sell oour patterns on their own and that's because we’re all about the full experience 💅
Cardigang kits are designed to be beginner-friendly and stress-free — which means we include everything you need to make your project a success: beautiful yarn, easy-to-follow instructions, tools, and support (hi, video tutorials + hotline). We’ve tested our patterns with our yarn, so you get the best possible result without the guesswork.
By bundling the pattern with the kit, we can make sure you’ve got the right yarn, the right tools, and the right info — no yarn roulette, no stitch confusion. Just that “look what I made!” feeling at the end.
You sure can! All our yarns can be found under "YARN" in the main menu.
If you've finished a kit and want to knit it again, you can simply buy more yarn without needing to buy the whole kit.
Or if you'd like to modify your pattern to make it longer, for example, you can add some extra yarn to your order.
When it comes to knitting, the magic’s in the method — not the dominant hand. ✨
Whether you’re a leftie or a rightie, knitting is all about the direction of movement and the position of the yarn, not which hand is doing the heavy lifting. That's why our tutorials show the standard method (working from left to right - just like reading) we find that works for everyone, regardless of their dominant hand.
faqs
troubleshooting tips
We’ve got you covered! You can reach out to us anytime at stitchup@cardigang.com.au. We also have a friendly and welcoming online community where you can share your progress, ask questions, and get tips from fellow makers.
The short answer? It depends on the project — and your personal vibe. Both needle types do the same job (helping you knit up something fabulous), but they each have their perks.
If you're just starting out with something small (like a scarf or beanie), straight needles are a great way to learn. But if you’re diving into bigger projects, want a comfier feel, or plan to knit in the round, circular needles are your new bestie.
Good news? Our kits are matched with the best needles for each project — so you don’t need to stress. Just open the kit and start stitching.
You can find more information here.
Gauge can vary based on individual tension.
If you're working with a Cardigang kit then you can be assured that we've provided the right size needle or hook for the project. So to fix the gauge you'll need to look at how tight or loose your stitches are. If the tension is too tight, your piece will be too small, and if it's too loose it may not hold its shape and might be too big.
If you're winging it with your own needles and yarn, try using a different needle or hook size to achieve the correct gauge. Swatching before you start your project can help ensure a perfect fit.
Consistent tension takes practice. Try to relax and maintain a steady rhythm. Holding the yarn differently or adjusting your grip can also help. Check out our tips on achieving even tension.
Don’t panic! Dropping a stitch happens to the best of us. Check out our how-to videos and guides for step-by-step instructions on how to pick up a dropped stitch and get back on track.
Don’t stress — adding stitches is super common when you’re starting out.
One sneaky culprit? The working yarn not hanging down when you start a new row. If it’s looped over your needle, it can look like you’ve got two stitches instead of one (rude). There are a few other ways you might accidentally add a stitch or two - check out our video for other ways those rogue stitches sneak in, and try counting your stitches every few rows while you’re still learning the ropes. 🧶💪
If you’ve only added a couple of extra stitches and you've spotted it quickly, the quickest fix is to knit or purl the first two stitches of your next row together to reduce your stitch count by one and get back on track.
Joining a new ball of yarn sounds tricker than it is. We have tutorials and tips available on our website to show you different methods for a seamless transition.
Colour switchin’? We love to see it 🎨✨ Changing colours is easy-peasy. When you go to start a new row, just tie the new yarn in a knot around the working yarn tail, then slide the knot up to the base of the first stitch, then drop the old yarn, and start knitting with the new yarn like you would normally.
On the next row, give both yarn tails a gentle tug to neaten things up and tighten the knot.
Want to see it in action? Check out our how-to video for a visual walkthrough that’ll have you changing colours like a pro.
While it might be surprising to hear, it's not uncommon to come across a knot in your yarn ball. Most balls aren’t made from one single, endless piece of yarn. When yarn is spun sometimes a spool runs out or the yarn breaks in these case the two ends are tied together with a small knot so the spinning can continue.
This is totally normal and happens even in high-quality yarn. That said, you should expect no more than 1-2 knots per ball.
What should you do when you find a knot?
- For small projects or if you want a perfect finish: Cut the yarn at the knot and join a new piece using your favourite joining method and weaving in the ends later.
- For less noticeable areas or when it doesn’t matter much: You can sometimes just knit or crochet past the knot—especially if it’ll be hidden inside the fabric.
If you've come across a ball with more than 1-2 knots in it, just send us an email at hello@cardigang.com.au with a picture of the ball in question and we can arrange a replacement ball to be sent out.
Absolutely! Knitting and crochet are very forgiving crafts. You can undo stitches to correct mistakes. We have resources available to help you “frog” your work (rip it, rip it!) and start again.
Uneven stitches are common, especially when you’re just starting out. Make sure you’re maintaining consistent tension and take your time. Practice makes perfect!
We’re here for you! If you’re stuck on a part of the pattern, reach out to us at stitchup@cardigang.com.au. We can provide additional guidance and support to help you through it.
First things first — take a deep breath and step away from the scissors. 🧘♀️
Before hitting panic mode, check your tension. If it’s a bit looser than the pattern suggests, you might be using up more yarn than expected. Also, double-check that you’re making the size you ordered (we love an ambitious upgrade, but it does eat yarn!). Finally, make sure that you're not adding rogue stitches by counting the stitches on your needle.
If all of those look good and you’re still coming up short, no stress — get in touch with us at hello@cardigang.com.au and we’ll help you get your hands on more yarny goodness to finish your masterpiece. 🧶✨
It happens! Sometimes projects don’t go as planned. Reach out to us for advice or join our online community to get feedback and tips from our fellow gang.
Once you’ve finished your masterpiece, it’s time to tidy those loose yarn tails – and that’s where your darning needle comes in. You'll simply weave the ends back into the seam or into the knitted fabric using your handy little needle 🪡
Here’s how:
1. Thread your yarn tail through the eye of your darning needle (a little spit or a twist helps if it’s being stubborn).
2. Working on the inside of your piece, weave it either into the seam or into the fabric through the back of your stitches – aim to follow the natural line of your knitting so it blends in.
3. Go in one direction for a few centimetres, then turn and go back the other way (this helps lock it in).
4. Snip off any excess yarn once it’s secure – but don’t cut too close. Leave a little breathing room!
There could be several reasons for this. Double-check your gauge, tension, and pattern instructions. If you’re still unsure, email our special SOS hotline stitchup@cardigang.com.au for personalised advice and support.
If you've lost your paper pattern (or the dog has eaten it - yes, it happens!), just let us know by emailing hello@cardigang.com.au and we'll send you a digital copy via email. We're here to help you keep your projects on track!
FAQS
AFTERCARE TIPS
Each kit comes with care instructions specific to the type of yarn used. Generally, hand washing in cool water and laying flat to dry will keep your handmade piece looking its best.
Most handmade items, especially those made with delicate or luxurious yarns, should be hand washed in cool water using a gentle detergent. Avoid wringing or twisting the fabric to prevent stretching.
Some items might be machine washable, but it’s always best to check the care label of your yarn. If machine washing is recommended, use a gentle cycle with cool water and place the item in a mesh laundry bag to protect it.
Lay your items flat to dry on a clean towel or drying rack. Avoid hanging them up as this can cause stretching. Reshape the item while it’s damp to ensure it maintains its original shape.
Ironing is generally not recommended for knit or crochet items, especially those made with delicate yarns. If you need to remove wrinkles, use a steamer or gently pat the item with a damp cloth.
Store your knit and crochet items in a cool, dry place away from direct sunlight to prevent fading. Fold them neatly and place them in a drawer or a breathable storage bag. Avoid hanging them to prevent stretching.
Pilling is normal for many types of yarn, especially those with shorter fibers. Use a fabric shaver to gently remove pills and keep your item looking fresh.
Blocking can help shape and even out your knit or crochet pieces. Wet blocking (soaking and then shaping the item) or steam blocking (using a steamer to shape the item) are common methods. Follow the specific blocking instructions for the type of yarn you used.
If your knit or crochet piece stretches out, try wet blocking it again to reshape it. Soak the item in cool water, gently squeeze out excess water, and lay it flat to dry, reshaping it as needed.
To freshen up your items, try airing them out or using a fabric freshening spray. You can also place them in the freezer for a few hours to kill any odors or bacteria.
Yes! Use a crochet hook or a blunt needle to gently pull the snagged yarn back into place. If needed, secure the area with a small stitch on the wrong side of the fabric to prevent further damage.


