


THE LILY SCARF
Your step-by-step guide to making your masterpiece
Hey there, stitch superstar! You’ve got your knitting kit and you've unlocked the secret sauce to making your very own Lily Skinny Scarf, and we’re excited to be stitching it out with you.
This guide will be your BFF through the entire journey. Whether you’re brand new to knitting or just here for a refresh, we’ll take you from “how do I hold these sticks?” to “look what I made!” — one cosy row at a time.
Heads up! You'll need the physical pattern that came in your knit kit as well as this online guide. The pattern contains the specifics, this guide gives you the extra layer of detail.


INCLUDED IN YOUR KIT


Knitting Glossary
(AKA the Stitch Decoder)
ROW
One line of stitches worked across the needles.
GAUGE
The number of stitches and rows within a 10x10cm square. Checking your gauge helps ensure your finished project is the correct size.
STOCKINETTE STITCH
The name for the stitch pattern created when you knit one row of stitches, then purl the next row of stitches.
PRACTICE MAKES PERFECT (Or CLOSE ENOUGH!)
Before we dive into the good stuff, let’s warm up those hands and needles. Think of this like stretching before a workout, except comfier, cuter, and way more fun.
Grab some of the yarn from your kit (just a little, you’ve got enough to spare!), and get familiar with the motions. Try out the stitches you’ll be using in this pattern. This is your time to mess it up, try again, and feel things out — no pressure, no judgement, just you and your new fave hobby.
Bonus: practising now = fewer headaches later (trust us on this one).
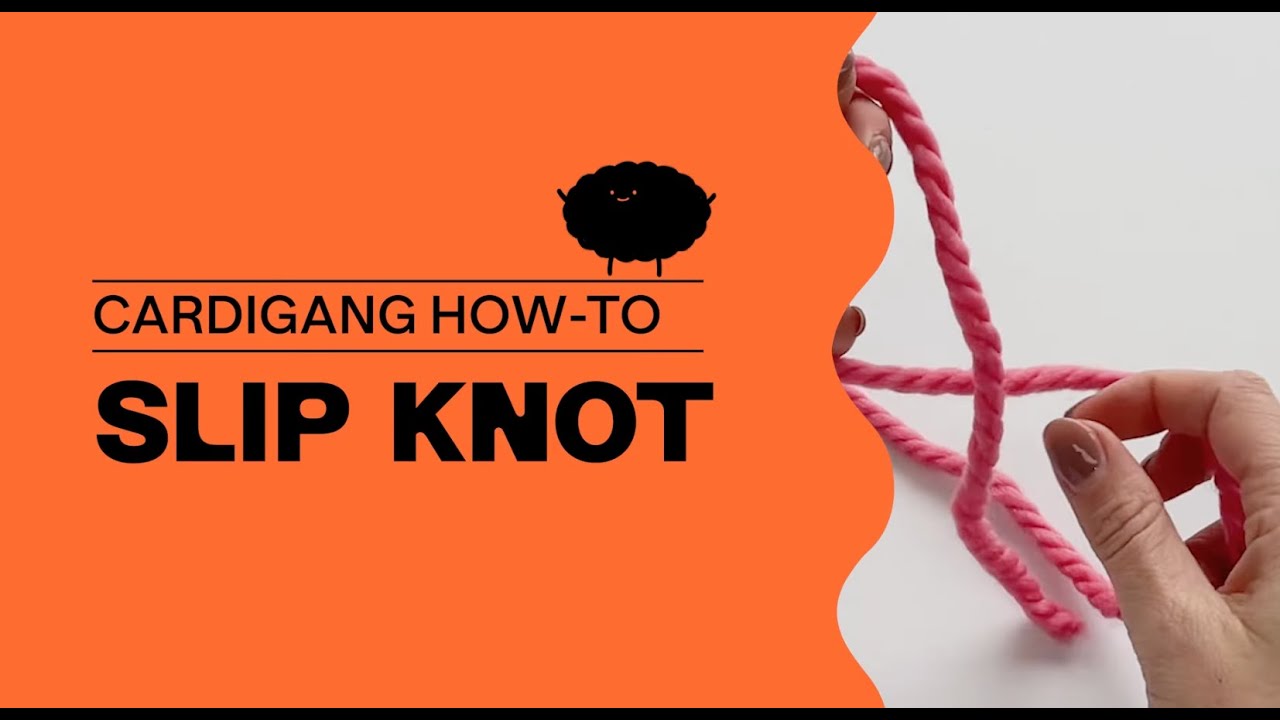
Slip Knot
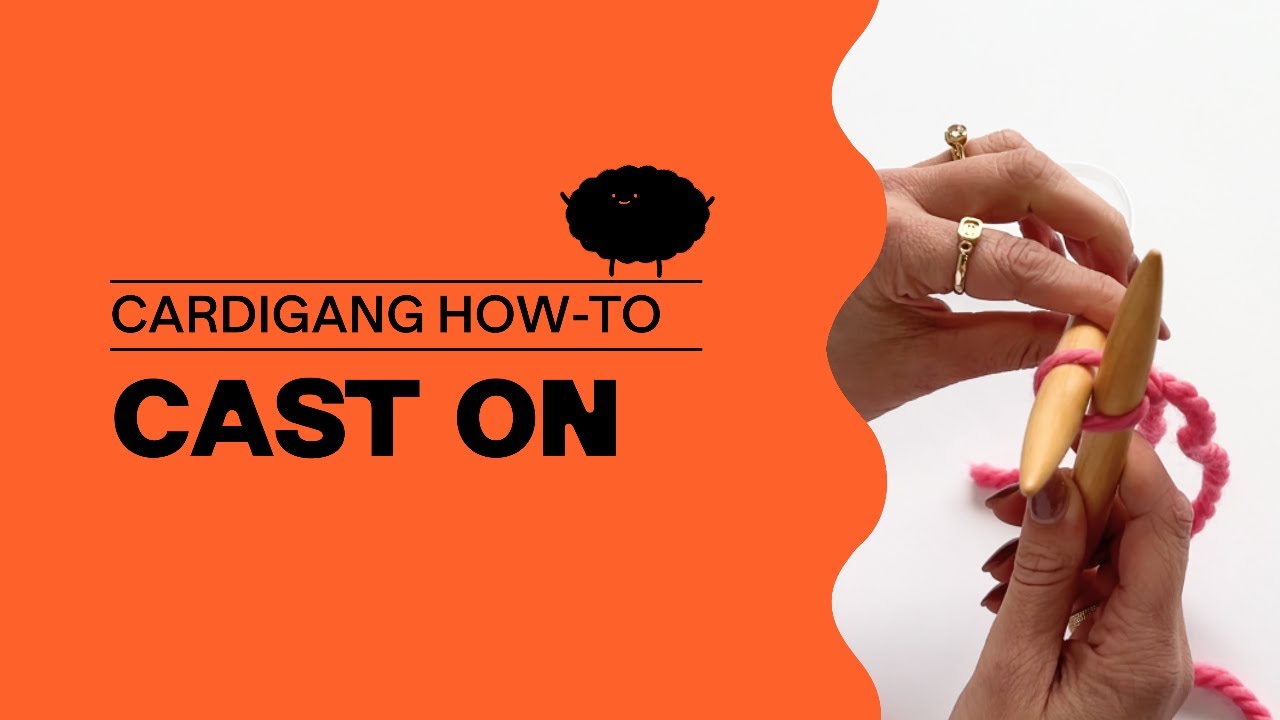
Casting On
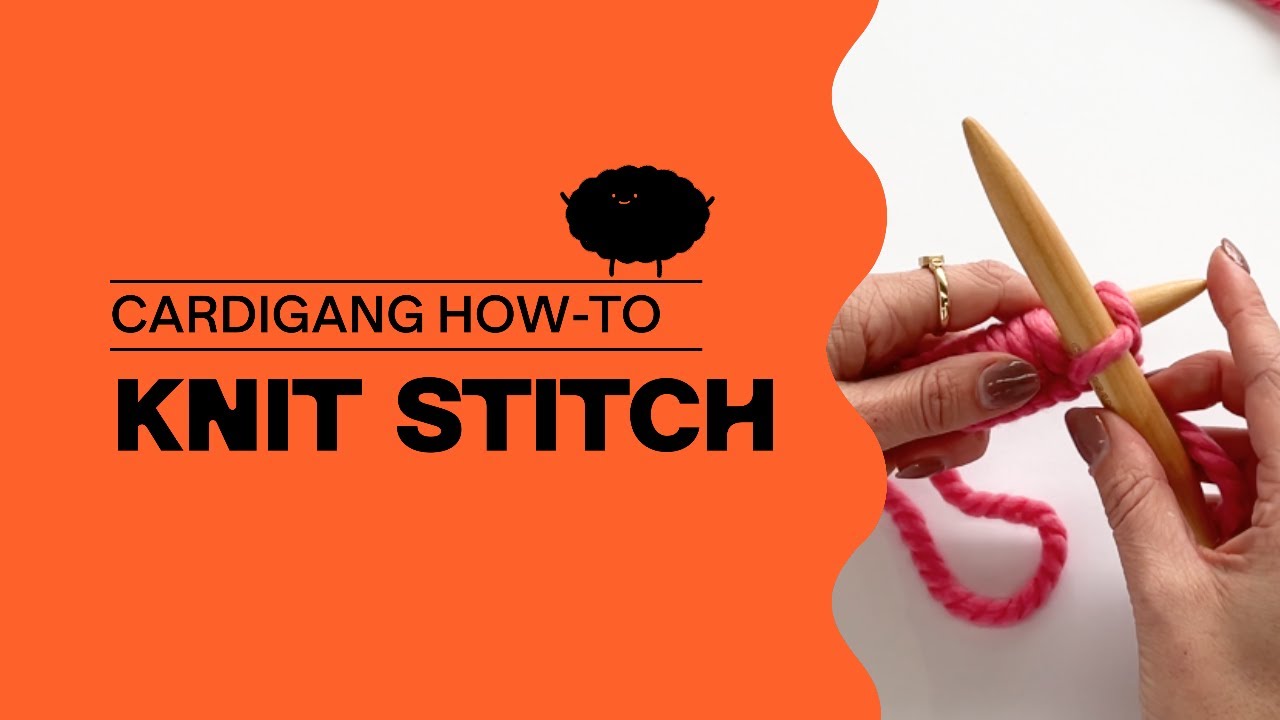
Knit Stitch
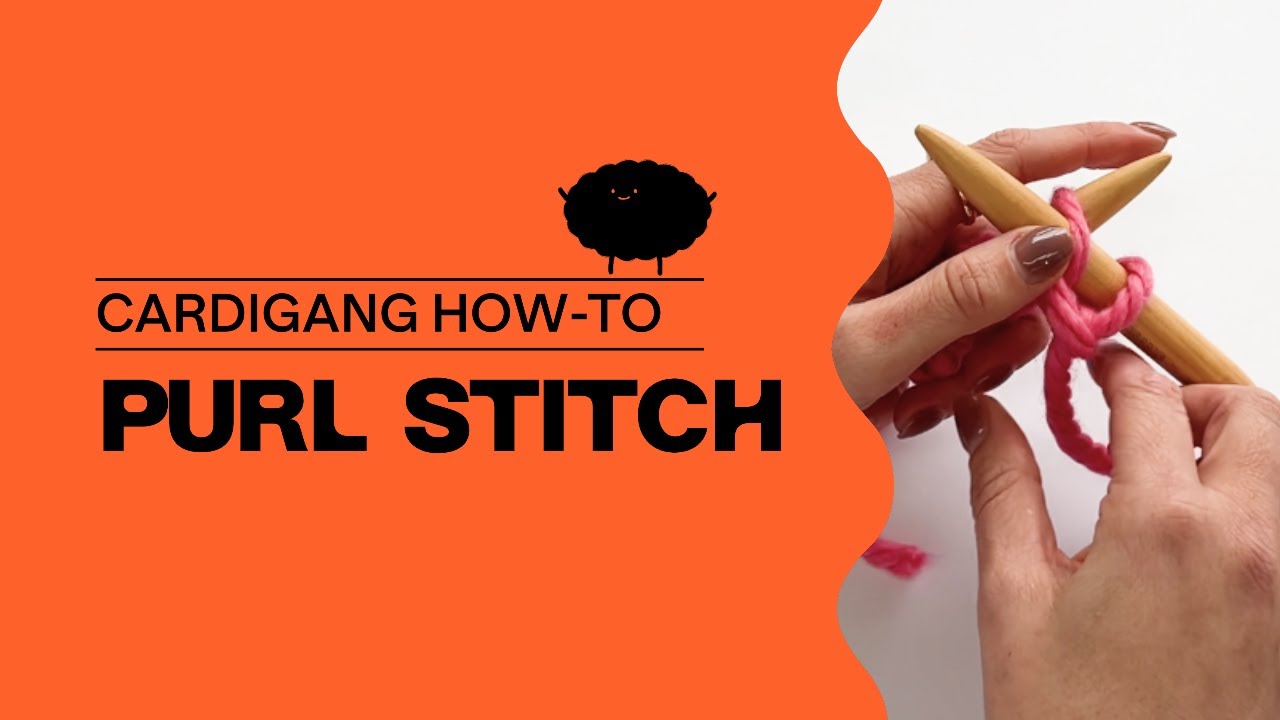
Purl Stitch
Casting Off

TEST YOUR GAUGE
Once you’re feeling comfy with the stitches, it’s time to check your gauge. We know, we know — it sounds technical, but it’s really just about making sure your tension matches the pattern.
Why? Because different knitters = different stitch tightness. And we want your finished masterpiece to fit like a dream.
So grab your measuring tape, knit up a little swatch (there’s a guide for that at the link below!), and let’s make sure you’re on track before the main event begins.
 How to test your gauge
THE LILY SCARF
If done correctly, your 10x10cm knitted swatch should measure 16 stitches wide, and 22 rows high when knitted in stockinette stitch on your 5mm needles.


Repeat after me:
“I solemnly swear to knit bravely, unpick calmly, and pretend I meant to do that.
I accept that chaos is part of the craft, and possibly part of my personality.
I will finish what I start… eventually.”


We knit the Lily Scarf in one long piece alternating rows of knit stitch and purl stitch to create a stockinette stitch pattern. For those feeling up for the challenge you can add i-cord edging which will help stop your scarf edges from curling inwards.
Using your 5mm needles, cast on the correct number of stitches.
💭 If you're using circular needles your stitches will run down onto the plastic tube connecting your needles. That's totally fine!
💡 Your piece of knitting will grow as you knit so don't be concerned if after you've cast on the piece doesn't look wide enough.
We knit our scarf in stockinette stitch.
Stockinette stitch is one of the most common knitting stitch patterns. It’s created by knitting every stitch on the right side of your work and purling every stitch on the wrong side.
The result is a smooth fabric with neat V-shaped stitches on the front and a bumpy texture on the back.
So for your first row, knit all stitches.
For your second row, purl all stitches.
Repeat row 1 and 2 until you’ve got just a small handful (around 1 meter) of yarn left in your second ball. You’ll do around 580 rows total.
🧶 When your first ball runs out you’ll start a new one. To do this, simply leave a 10–15cm tail from the old yarn and begin knitting with the new ball, holding both tails together for a few stitches. Then, drop the old yarn and continue with the new one. You can weave in the ends later to tidy things up - easy as that!
💡 When you put your knitting down, it’s always best to stop at the end of a row, not mid-way through. That way you won’t get confused about what direction you’re knitting in!
For those who feel up for the challenge, you can add an i-cord edge to your scarf. It can help stop the sides from curling in as much. If you want to made the i-cord edge, you'll slip the last 3 stitches of every row. Here's how:
On a knit row: Knit stitches as normal until you have 3 stitches left. Slip the last 3 stitches purl-wise onto the right needle leaving your yarn at the back of your work.
On a purl row: purl all your stitches as normal until you have 3 stitches left. Slip the last 3 purl-wise onto the right needle leaving your yarn at the front of your work.
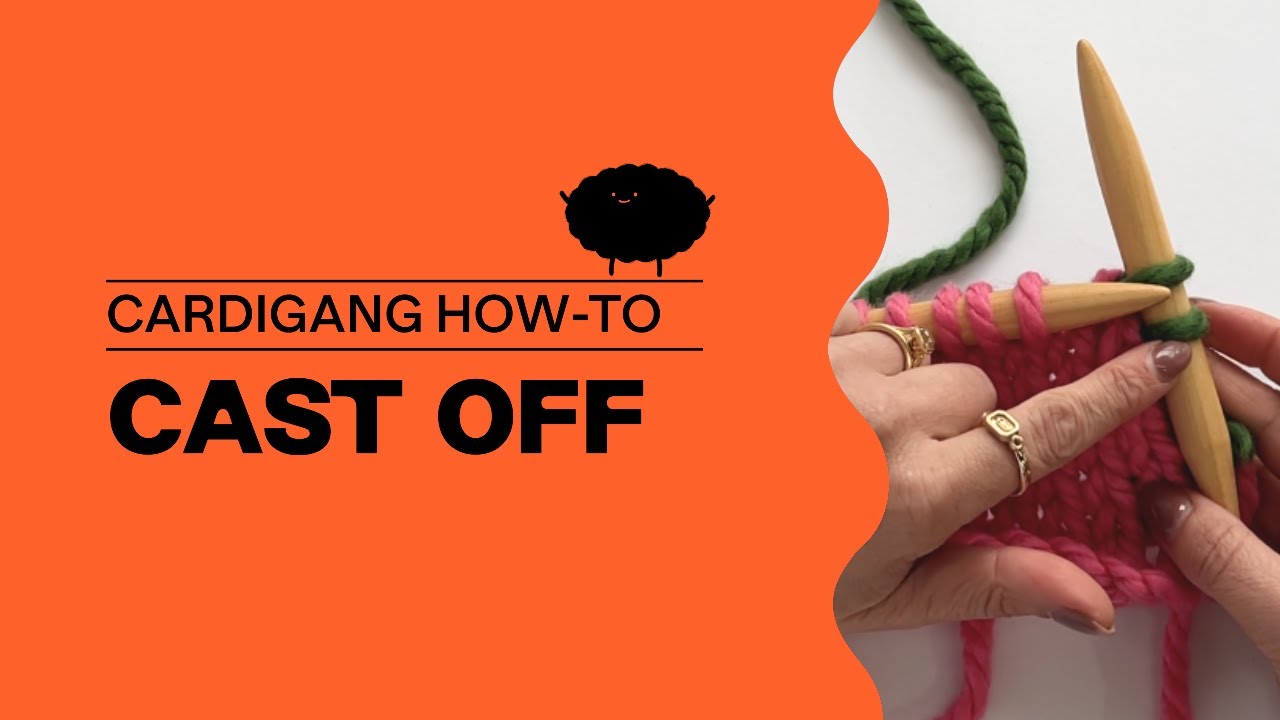
When you’ve got a handful of yarn left (or when your scarf reaches the desired length) you’ll cast off the stitches.
When you've got just one stitch left on your right needle, simply cut your yarn from the ball (leaving about 20cm) and thread the loose end back through your last stitch to secure it.
🔥 Nice Work!
🪡 The final thing you'll do is use your darning needle to weave the yarn tails back into your work. This gives you a neat finish.
To do this, thread the darning needle with a tail, then pass the needle through the stitches on the wrong side of your work, following the path of the yarn for 5–10cm. Then change direction and weave back through a few more stitches to help lock it in place. Because seamless projects don’t have seams to hide ends in, try to stay within the structure of the stitches so the tail disappears without creating bulk or showing through to the front. Once it’s secure, trim any excess yarn close to the fabric.

