


A step-by-step guide to knitting the Archie Beanie
Ever gotten halfway through a project and thought “Hang on, am I even doing this right?” We have 🙋♀️
That’s why we’ve created these step-by-step guides to walk you through the knitting process.
Even if you've never knitted before, we'll take you from zero to knitting hero in no time 🦸♀️
When it comes to knitting, practice makes perfect
Before we get started on the pattern we suggest you spend a bit of time learning the basic stitches you’ll need to complete your masterpiece.
The Archie Beanie is a great project if you've knitted one or two cosy masterpieces before and it's an excellent introduction to knitting in the round. If you're a total beginner you'll want to be confident with the knit stitch and its friend the purl stitch before we start. We put the knit and purl stitches together to make a 2x2 rib stitch. You'll also want to get the hang of knitting in the round.
You can use the yarn that came in your kit to practice with. Once you've got these mastered you'll find the pattern a cinch!
Total beginner? 👩🏫
For a more comprehensive lesson on the basics of knitting visit our Learn How To Knit page.
Onto the Beanie!
⚡️What you'll need
Your kit comes with everything you'll need to make your masterpiece. In your kit you'll find;
- 10mm circular needles
- 1 ball of Cardigang Chunky Merino Wool
- Stitch markers
- A darning needle
- Made by me tag
You also want to have a pair of scissors handy.
🧶 Let's knit up a storm!
Time to get click-clacking and whip up your cosy beanie.
Remember learning a new skill can be a little challenging at first, and you’re bound to find yourself making some mistakes along the way. But as with learning anything, your brain and your hands slowly start to get the hang of it, muscle memory is created, and soon the thing you found tricky/daunting/scary is like second nature! 💪
STEP 1
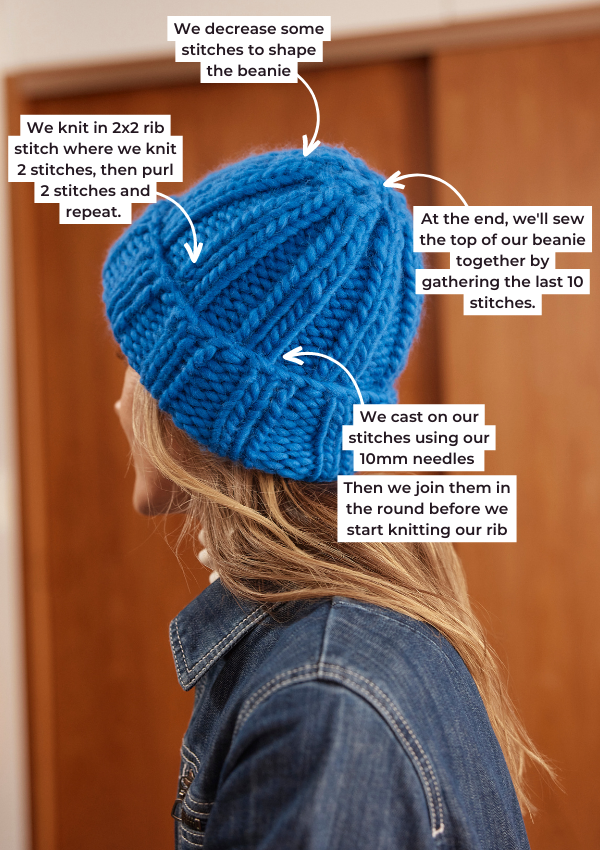
We knit our beanie from the bottom up. Archie is knitted in a 2x2 rib stitch, so once you've cast on you'll be knitting the same 4-stitch combination (knit 2, purl 2) for the majority of your work.
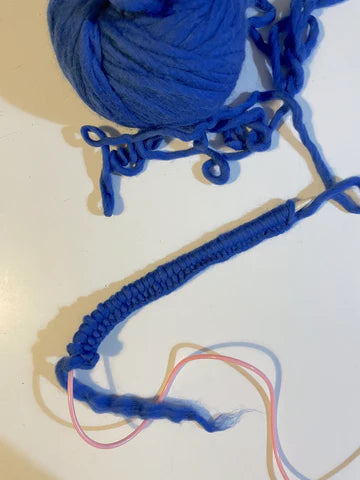
So to start, let's cast on the required number of stitches using your 10mm needles.
STEP 2
Once you've cast on the right number of stitches you're going to join your work in the round. If you need a refresher on joining your stitches watch the video below 👍
Knitting in the round is where we use our circular needles and knit continuously in loops, rather than back and forth in rows (like a lot of beginner patterns do). Now don't worry! It's not anywhere near as hard as it sounds. When knitting in the round, you're always knitting on the "front" side of your work so you don't need to turn the piece to knit on the "back" side. Plus, you don't need to sew your beanie together at the end!
Hot tip: your piece will 'grow' as you knit so don't be alarmed if it looks like you're knitting a baby's beanie to start with!

You're going to knit the 2x2 rib stitch for the allocated number of rows. Remember to mark the start of each loop with a stitch marker and tick off the circles to keep track of each row you've completed.
💭 A stitch marker can be anything round; a ring, hair tie or a spare piece of yarn.
This is what your work will look like after you've knitted your first loop of 2x2 rib stitch.

💭 Make sure you’re moving your yarn tail from the back to the front of your work between each stitch type (bring the yarn in through the middle of the stitches) to ensure the rib is executed correctly.

STEP 3-7
We're getting close, I can see the finish line 🎢🙌
Now, we're going to start reducing our stitches. We reduce stitches in the final rows of the beanie to give it the shape it needs. This is done by knitting or purling some stitches together. This simply means we put our right needle into the second stitch on your left needle and collect both the first and second stitches and knit them as you would a single stitch.
📹 Watch how to knit two stitches together
📹 Watch how to purl two stitches together
Follow the instructions in the pattern to reduce your stitches down to 10.

STEP 8
Grab your darning needle, we're going to sew the top of our beanie up! 🔥
We'll cut our yarn from our ball (you'll want about 20cm to work with), and thread the darning needle with it. Then use your darning needle to pick up the remaining 10 stitches in a counter-clockwise direction. Once all the stitches are collected you can slip the 10mm needles out of the work and now it's just a case of using the darning needle to secure those stitches. We like to continue in a counter-clockwise direction and thread the yarn back around the top of the beanie to keep it nice and secure. Then tie a knot on the inside of the beanie to keep it secure.
FINISHING
The last thing we do for every piece is weave in the ends. That’s basically just tidying up the piece so all loose ends are trimmed down and tucked into the inside of your work. You use your darning need and weave those ends into the seams so they are nicely hidden away.
D.O.N.E! You've finished your beanie, well done! Epic work 🤩 If this was your first-ever knitting project or one of many, we hope you had a blast click-clacking and making your masterpiece 💥❤️
In a bind and need a little more help?
Email us at stitchup@cardigang.com.au and we'll be able to help! Whether you're just starting out, or you've got a specific question or problem (dropped a stitch, no stress!), we're here to get you out of a bind.