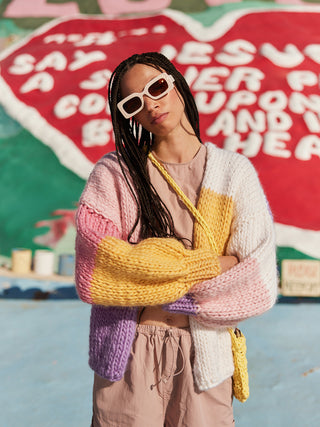
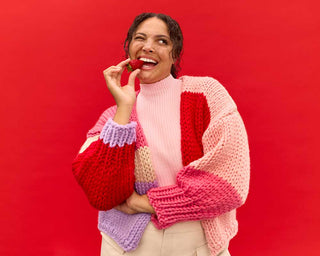
A step-by-step guide to crocheting the Daisy
Cardigan.
Ever gotten halfway through a project and thought “Hang on, am I even doing this right?”
We have 🙋♀️
That’s why we’ve created these step-by-step guides to walk you through the process.
THE BASICS
If you're a total newbie - WELCOME! 👋 Learning to crochet can feel a bit daunting to start with. That's why we've stripped away the complicated jargon and tried to keep things really simple so even if you're picking up the hook for the first time you can make a masterpiece.
Before we get started on the pattern we suggest you spend a bit of time learning the basic stitches you’ll need to complete your masterpiece. You can use the yarn that came in your kit to practice with. Once you've got these mastered you'll find this pattern is a cinch!
Click here to learn the basics
⚡️Let's get ready to rumble ⚡️
TEST YOUR TENSION
First thing's first. Before you start your project, make sure your tension is juuuust right 🥣 We do this by making a “tension swatch”. It's a bit like goldilocks, if the tension is too tight, your piece will be too small, and if it's too loose it may not hold its shape and might be too big.
If done correctly, your granny squares should measure 10cm x 10cm when made using your chunky cotton and 9mm hook. Your sleeves should measure 5 rows x 9 stitches when worked in granny stitch on your 9mm hook.
Onto the Cardi!
Remember, if you need a refresher on any of the techniques, check out our Learn to Crochet page.
SIZING
You can make your cardi in size 6-8, 10-12, 14-16, 18-20 or 22-24. Your pattern is read like this: 6-8 (10-12, 14-16, 18-20, 22-24). Make sure you're following the right instructions for your chosen size.
MEASUREMENTS
Laying flat, your finished piece will measure approximately:
- 6-8: 42cm wide x 41cm high
- 10-12: 52cm wide x 51cm high
- 14-16: 52cm wide x 61cm high
- 18-20: 62cm wide x 61cm high
- 22-24: 62cm wide x 61cm high
LET'S WHIP UP A MASTERPIECE
Your pattern is written in U.S terms.
Our cardi is made up of granny squares which we sew together and then add sleeves. You'll make a combination of classic and daisy squares. When it comes time to put them together we've got a chart that shows you what order you'll join them.
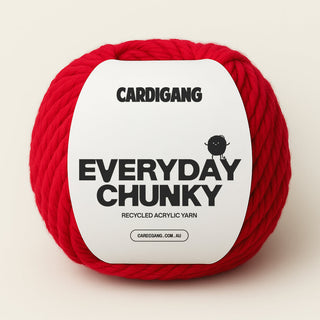
🌈 Identify your main colour before you start - you’ll have 6-13 balls of your main colour and you'll use this for the last round of your squares. The other colours in your kit can be rotated as colour 1 and 2 in your squares.
GRANNY SQUARES
Classic Square
Here's what your Classic Square will look like. And below is a video that shows you how to make it!

Daisy Square
Here's what your Daisy Square will look like. And below is a video that shows you how to make it!

JOINING YOUR SQUARES
For placement, refer to the square charts at the bottom of this page.
We'll use our main colour to join our squares together. We’re using the "slip stitch on the back side" joining method and we'll join the horizontal seams first.
STEP 1

STEP 2


STEP 3
STEP 4

STEP 5

SLEEVES
To create our sleeves we're going to do a granny stitch.
ROUND 1
Using your main colour, and with your right side facing you, join your yarn in the chain 2 space of the diagonal square to the right of your underarm, chain 3 (counts as a stitch in your granny stripe pattern).

📉 We're now going to decrease the sleeve.
Granny stitch decrease:
STEP 1
Yarn over, insert hook through same chain 2 space and pull yarn through. Yarn over and pull through first 2 loops. You should have 2 loops remaining on your hook. Working into the next chain 2 space (corner of next square), yarn over and insert hook through chain 2 space, pull yarn through. Yarn over and pull through first 2 loops. You should now have 3 loops on your hook. Yarn over and pull through all 3 loops. 1 double crochet in same space.

STEP 2
1 double crochet in next space between clusters, yarn over and insert hook through same space and pull yarn through. Yarn over and pull through first 2 loops. You should have 2 loops remaining on your hook. Working into the next space (between clusters), yarn over and insert hook through space, pull yarn through, yarn over and pull through first 2 loops. You should now have 3 loops on your hook. yarn over and pull through all 3 loops. 1 double in same space.
Size 22-24 only:
1 double crochet in next chain 2 space. Repeat step 1 & step 2 once more.
STEP 3
All Sizes: 1 double crochet in next chain 2 space. Repeat granny stitch decrease in step 1 (working the second part of the decrease into the diagonal square to the left of your underarm).

STEP 4
2 double crochets in next chain 2 space, [2 double crochet in next 2 spaces between clusters. 1 double crochet in chain 2 space. Repeat granny stitch decrease from step 1]. Repeat from [ to ] x 2 (2, 4, 4, 4) more times.
STEP 5
2 double crochets in next 2 spaces between clusters, 2 double crochets in last chain 2 space.
STEP 6
Slip stitch in top of the chain 3 to join. ✔️ Fasten off. You should now have 16 (16, 22, 22, 25) clusters, 38 (38, 52, 52, 58) stitches.

ROUND 2
🧶 Change colour (first sleeve stripe).
Step 1
Join new colour yarn in underarm in any space between clusters (remembering the decreases from row 1 will count as 1 cluster now instead of 2).
Step 2
Chain 3, 1 double crochet in same sp.
Step 3
2 double crochets in every space between clusters until end of round.
Step 4
Slip stitch in top of chain 3 to join.
Step 5
Slip stitch in next stitch, slip stitch in next space between clusters. Do not cut yarn. You should now have 32 (32, 44, 44, 50) stitches.
ROUND 3
Step 1
Chain 3, 1 double crochet in same space
Step 2
2 double crochets in every space between clusters until end of round.
Step 3
Slip stitch in top of chain 3 to join. ✔️ Fasten off.
ROUND 4
🧶 Change colour
Step 1
Join yarn in any space between clusters.
Step 2
Chain 3, 1 double crochet in same space.
Step 3
2 double crochet in every space between clusters until end of round.
Step 4
Slip stitch in top of chain 3 to join.
Step 5
Slip stitch in next stitch, slip stitch in next space between clusters. Do not cut yarn.
ROUND 5
Step 1
Chain 3, 1 double crochet in same space.
Step 2
2 double crochets in every space between clusters until end of round.
Step 3
Slip stitch in top of chain 3 to join. ✔️ Fasten off.
REPEAT
Repeat rounds 4 & 5 x 10 (10, 9, 8, 8) more times, or until you have reached your desired sleeve length.
Remembering to change colours after every 2 rounds. You can follow the colour sequence pictured or come up with your own. You will need 24g of yarn for every stripe (2 rounds).

EDGING
Step 1
Using your main colour, (right side facing you) join yarn in the centre back of the neck (between clusters).Step 2
Chain 3, 1 double crochet in the same space.Step 3
Work in granny stitch until you reach the bottom corner of your front panel.Step 4
We're going to shape our corner edge now. 2 double crochets in chain 2 space, chain 2, 2 double crochets in same space.
Step 5
Continue working in granny stitch until you reach the bottom corner of the opposite front panel.Step 6
Repeat step 4 to complete your second corner edge.Step 7
Continue working in granny stitch until you’re back where you started. Slip stitch in top of chain 3 to join. ✔️ Fasten off. Use your darning needle to sew in the ends.
INNER EDGING
We're now going to do an extra row of edging along the inner edge only.
With the right side facing you, join your yarn in the corner of your front panel, chain 3, 1 double crochet in the same space.

Work in granny stitch until you reach the corner of the opposite front panel.
✔️ Fasten off. Sew in any remaining ends with your darning needle and enjoy!
FINISHED!
Time to rock your masterpiece 💪🔥🥳
Well done on finishing your top! Epic job. We know from experience that there's nothing quite like that first time someone asks you where you got your top from 😎
We'd LOVE to see how you go! Share your masterpiece with us by tagging @cardigang_knits on socials or by sending us an email at hello@cardigang.com.au
Until next time! 😘🧶💕
Morgan & Cat xx
SQUARE PLACEMENT CHARTS
Size 6-8

Size 10-12

Size 14-16

Size 18-20

Size 22-24


