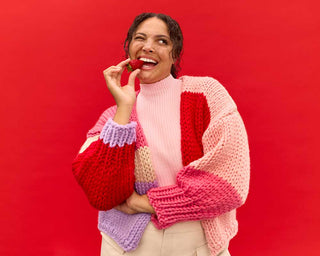
A step-by-step guide to knitting the Jaime Cardigan.
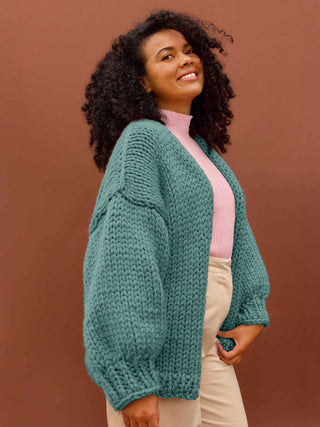
The Jaime Cardi is a special collaboration with our friend Jaime of Jaime Creates. She’s a candy-striped, airy cardi featuring a drop stitch which makes her lightweight and the perfect transeasonal companion.
JAIME CREATES

Jaime is an Aussie knitwear designer with a passion for creating bold and unique designs that you will want to wear everyday. She takes inspiration from bright, pastel colours and loves experimenting with different textures and stitch patterns. An avid Instagram user, Jaime enjoys sharing her design process and general love of knitting with people from all over the world!
Check out Jaime’s wonderfully woolly Instagram.
ON TO THE KNIT!
If you're a total knitting newbie - WELCOME! 👋 Learning to knit can feel a bit like learning code. We've stripped away the complicated jargon and tried to keep things really simple so even the newest knitter can master the skill 🧶👩🎓
Before we get started on the pattern we suggest you spend a bit of time learning the basic stitches you’ll need to complete your masterpiece (spoiler - there are only five!). You can use the yarn that came in your kit to practice with. Once you've got these mastered you'll find this pattern is a cinch!
Click here to learn the basics
⚡️Let's get ready to rumble ⚡️
TEST YOUR TENSION
First thing's first. Before you start your project, make sure your tension (how tightly or loosely your knitting is) is juuuust right 🥣 We do this by knitting a “tension swatch”. It's a bit like goldilocks, if the tension is too tight, your piece will be too small, and if it's too loose it may not hold its shape and might be too big.
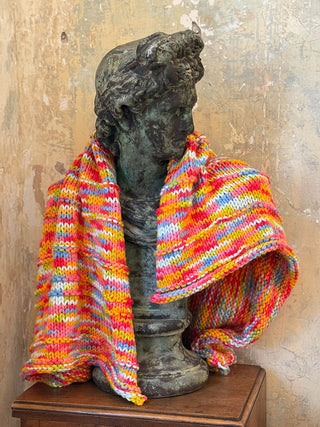
If your tension is right your 10x10cm swatch will be 5.5-6 stitches wide and 7.5-8 rows high when knitted in drop garter stitch on 12mm needles. (The drop stitch pattern is stretchy, which means the gauge is not as rigid/fixed).
The drop garter stitch pattern is as follows:
- Set up row: knit all stitches
- Row 1: Knit all stitches, wrapping the yarn around the needle twice instead of once when you complete the stitch.
- Row 2: knit all stitches, dropping the extra wrap off the needle when you complete the stitch.
- Repeat rows 1-2 as many times as required
💡 We know knitting a gauge swatch can seem like a bit of a drain, but it's really important because the difference of a few millimetres in a gauge swatch can lead to a finished piece this is quite different in size to what you intended.
SIZING
You can knit your cardi in size 6-8, 10-12, 14-16, 18-20 or 22-24. Your pattern is read like this: 6-8 (10-12, 14-16, 18-20, 22-24). Make sure you're following the right instructions for your chosen size.
MEASUREMENTS
Laying flat, your finished piece will measure approximately:
- 6-8: 53cm wide x 42cm high
- 10-12: 60cm wide x 45cm high
- 14-16: 67cm wide x 47cm high
- 18-20: 74cm wide x 51cm high
- 22-24: 81cm wide x 56cm high
USING YOUR PATTERN
One of the things we found the hardest when we were learning to knit was keeping track of our rows. Before we were able to easily identify a row of stitches we used a pen and paper to keep track. That's why we've included handy circles in our patterns - you can tick them off as you go. The dashed circles are for the larger sizes.
You’ll knit the bottom section first, then split to make the two front panels and back panel (which create the armhole), then join the shoulders and knit the sleeves in the round.
🌈 You'll be knitting with three colours, colour 1, 2 and 3. You'll knit with each colour for two rows and you'll rotate the colours in the same order each time.
DROP STITCH
Drop it like it's hot! Let's first learn how to do a drop stitch.
Remember, if you need a refresher on any of the other techniques, check out our Learn to Knit page.
BOTTOM
We'll knit a large rectangle for the bottom of our cardi.
Using your 12mm needles, cast on the required number of stitches and then complete a row of knit stitch in colour 1.
From row two we'll start the drop garter stitch pattern. To create the drop stitch we'll wrap our yarn around the back needle twice when we knit it, then in the following row, you'll drop that extra wrap as you knit your stitch.
Complete the required number of rows changing colours every second row.
FRONT RIGHT/BACK/FRONT LEFT PANELS
We're going to work up these sections separately so we create the arm holes but the technique remains the same.
SEAMING YOUR SHOULDERS
Use your darning needle to sew the shoulder seams together.
NECKLINE RIB
We're going to pick up stitches from around your raw neckline to knit your 1x1 rib stitch. You'll knit the rib in colour 3.
Starting from the bottom of the front right panel, pick up stitches up and around the neckline. It will be a bit of a squishy fit on your needles but that's fine.
Because you've got an odd number of stitches we'll knit the rib starting with an alternating stitch type for each row. Knit your rib back and forth over 3 rows.
SLEEVES
We knit the sleeves from the top down in the round. You'll need two sleeves, so follow the instructions twice ✌️😊
Pick up stitches from around the sleeve opening. Use a stitch marker - anything round will do! to keep track of the rounds you knit. Because you're knitting in the round you'll be purling the second row (instead of knitting).
Complete the required number of rounds before we get to the decrease round. To decrease the number of stitches on your needle (and therefore, create the taper in your sleeve before we get to the cuff), you'll purl 2 stitches together along the length of the round.
Finish your sleeve with the 1x1 ribbed cuff. Then repeat for the second sleeve!
FINISHED!
Time to rock your masterpiece 💪🔥🥳
Well done on finishing your knit! Epic job. We know from experience that there's nothing quite like that first time someone asks you where you got your knit from 😎
We'd LOVE to see how you go! Share your masterpiece with us by tagging @cardigang_knits on socials or by sending us an email at hello@cardigang.com.au
Until next time! 😘🧶💕
Morgan & Cat xx


