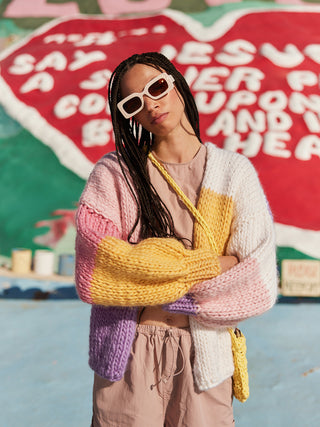
A step-by-step guide to crocheting the statement-making Mia Bomber
Ever gotten halfway through a project and thought “Hang on, am I even doing this right?” We have 🙋♀️
That’s why we’ve created these step-by-step guides to walk you through the process.
Even if you've never crocheted before, we'll take you from zero to hero in no time 🦸♀️
When it comes to crochet, practice makes perfect
Before we start the pattern, we suggest you spend some time learning the basic techniques you’ll need to complete your masterpiece 🤓
The Mia Bomber is a dream to whip up she's 'believe-it-or-not' beginner friendly! She's made using a combination of single crochet and double crochet stitches. You'll want to be confident with these stitches before we start. You'll also want to get a hang of tying a slip knot and chaining which is the first step in any crochet project.
You can use the yarn that came in your kit to practice with. Once you've got these mastered you'll fly through your project.
Total beginner? 👩🏫
For a more comprehensive lesson on the basics of crochet visit our Learn to Crochet page.
🥣 Test your tension
While we're practising and before you start your project, you'll want to make sure your tension (how tightly or loosely your crocheting is) is juuuust right 🥣 We do this by making a “tension swatch”. It's a bit like Goldilocks, if the tension is too tight, your piece will be too small, and if it's too loose it may not hold its shape and might be too big.
Gauge: If done correctly, your 10x10cm swatch should be 2 clusters wide and 2.5 rows high when made in granny stripe on your 10mm hook.
To test this let's give the granny stripe stitch a go. We'll do this over 3 rows.
Row 1: Chain on 10 + 1 stitches (the +1 makes your turning chain), and then you'll do one row of single crochet.
Row 2: Next, you'll chain 3 and turn your work. Then do one double crochet into the 1st stitch. Skip 2 stitches, then do 3 double crochets into the next stitch. Skip 2 stitches, then do 3 double crochets into the next stitch. Repeat to the end of the row.
Row 3: For this next row you'll work into the gaps from the previous row. Start by chaining 3, then turn your work. Do 3 double crochets into each gap.
That's your swatch done! Now, measure a 10x10cm square and count your stitches and rows within that space to make sure you're crocheting at the correct tension.
If you've got more stitches or rows than the instructions say you should have, your work is a little too tight, and if you've got less your work is too loose. Adjust your tension by holding the yarn a little more tightly/loosely as you crochet.

Onto the bomber, babe!

⚡️What you'll need
Your kit comes with everything you'll need to make your masterpiece. In your kit you'll find;
- 9mm hook
- 10mm hook
- 8-12 balls of Cardigang Chunky Merino Wool in 2 colours
- A darning needle
- Made by me tag
You also want to have a pair of scissors handy.
📏 Sizing and measurements
You can make your Mia Bomber in 5 sizes.
| SIZE |
MEASUREMENTS (laying flat) |
| 6-8 | 65cm wide x 44cm high |
| 10-12 | 70cm wide x 48cm high |
| 14-16 | 75cm wide x 52cm high |
| 18-20 | 80cm wide x 56cm high |
| 22-24 | 85cm wide x 56cm high |
Your pattern is read like this; 6-8 (10-12, 14-16, 18-20, 22-24). Make sure you're following the correct instructions for your size.
🧶 Let's do this, happy hooker!
Remember learning a new skill can be a little challenging at first, and you’re bound to find yourself making some mistakes along the way. But as with learning anything, your brain and your hands slowly start to get the hang of it, muscle memory is created, and soon the thing you found tricky/daunting/scary is like second nature! 💪

BACK PIECE
We crochet our bomber in pieces, starting with the back, then the front pieces, then lastly, the sleeves.
RIBBING
To start, chain on your foundation chain using colour 1 and your 9mm hook.
We make our rib vertically so you'll be making one long skinny strip.
💭 Try to make your chain stitches as evenly sized as possible. Don't pull the loops too tight because you'll struggle to work into these loops in your first row. On the other hand, if you make your loops too loose, your project will look a little messy.
Row 1
Once you've chained, you'll move on to the first row of single crochet.
Row 2 onwards
Continue doing single crochets. We're working just into the back loop. By doing this we create the 'rib' effect in our work. You'll need to make sure that you're putting your hook into the back loop of your stitches and not under both loops (bars) of the stitch.
BODY
Let's move onto the granny stripe now.
To create the granny stitch, you'll work multiple groups of double crochets to create clusters of stitches.
One of the best things about the granny stitch is its simplicity. Once you get the hang of it, the pattern becomes almost meditative, allowing you to relax and enjoy the rhythmic flow of crochet.
📹 Here's a reminder of how to do a granny stripe.
Row 1
We're going to work into the long edge of the rib now, so make sure the rib is sitting longways and you're working into the top of the rib piece. We're going to work up the back piece now.
Complete your double crochet stitches into the spaces indicated in the pattern. Remember you're creating clusters now so you'll be doing multiple stitches into the space.
Row 2
Change to colour 2. To change colours you'll tie the new colour to the old with a knot and begin working with the new colour.
📹 Watch How To Change Colours
Row 3 onwards
Continue following the pattern to knit up your back panel in granny stripe. Mark the circles off as you go to keep track!
FRONT
No surprises here! The front pieces are made up in the same way as the back. Just. Keep. Stitching. 🔥🚀🕺
SLEEVES
You're flying through this! We make the sleeves from the bottom up - just the same as we've been doing for the other pieces.

SEWING TOGETHER
Yes legend, you've (almost) made your bomber! 🕺
At this point, you'll have 5 lovely pieces of crochet handiwork.
There are two choices for joining your pieces. You can use your crochet hook and slip stitch the pieces together, or pick up your darning needle and sew the pieces together - this is the method we've used in the pictures.
OPTION 1: Slip stitch (crochet hook)
To slip stitch your pieces together you'll start with the horizontal seams.
🎬 Watch How to horizontal seam
Then join the sleeves and seam the sides using the vertical seams method.
🎬 Watch How to vertical seam
💡Make sure to work the slip stitches loosely so that the piece remains stretchy.
D.O.N.E! You've finished your bomber, well done! Epic work 🤩 If this was your first-ever crochet project or one of many, we hope you had a blast making your masterpiece 💥❤️
Looking for something a little more personal?
Sign up for a one-on-one knitting or crochet session with the Cardigang Hotline ☎️. These sessions are designed to help give you the skills you need to create a masterpiece. Whether you're just starting out, or you've got a specific question or problem (dropped a stitch, no stress!), we're here to get you out of a bind.


