A step-by-step guide to crocheting the super-stylish Rose Bag
Ever gotten halfway through a project and thought “Hang on, am I even doing this right?” We have 🙋♀️
That’s why we’ve created these step-by-step guides to walk you through the crocheting process.
Even if you've never crocheted before, we'll take you from zero to crochet hero in no time 🦸♀️
When it comes to learning to crochet, practice makes perfect.
Before we get started on the pattern we suggest you spend a bit of time learning the basic stitches you’ll need to complete your bag.
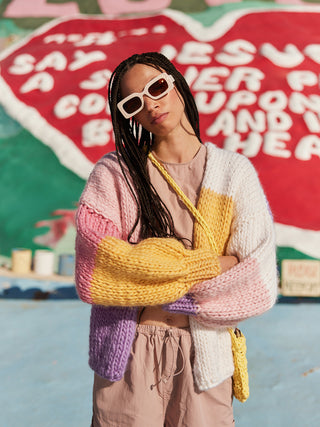
The Rose Bag is the ultimate cross-body bag. Perfect to throw your phone and lipgloss into, ready for the day! Plus, she's perfect for those dipping their toe into crochet for the first time.
She's made in double crochet so you'll want to be confident with the double crochet stitch before you start 🧶 You'll also want to get a hang of tying a slip knot and chaining which is the first step in any crochet project.
You can use the yarn that came in your kit to practice these stitches. Once you've got these mastered you'll find the pattern a cinch!
Note: We crochet our bag double strand but to practice we suggest just using one strand 🤓
Total beginner? 👩🏫
For a more comprehensive lesson on the basics of crochet visit our Learn How To Crochet page.
Onto the bag 👜🕺

⚡️What you'll need
Your kit comes with everything you'll need to make your masterpiece. In your kit you'll find;
- 3.5mm hook
- 1 ball of Cardigang Raffia
- A darning needle
- Made by me tag
You also want to have a pair of scissors and a tape measure handy.
⚡️Test your tension
Before you start your project, make sure your tension (how tightly or loosely your crocheting is) is juuuust right 🥣 We do this by making a “tension swatch”. It's a bit like goldilocks, if the tension is too tight, your piece will be too small, and if it's too loose it may not hold its shape and might be too big.
Gauge: If done correctly, your 10x10cm swatch should be 16 stitches wide x 8 rows high when made in double crochet, double strand, on your 3.5mm hook.
To test this, using double strand (more about working double strand below), chain 20 + 3 stitches (the +3 makes your turning chain), then work in double crochet for 11 rows. Then measure a 10x10cm square and count your stitches and rows within that space to make sure you're crocheting at the correct tension.
If you've got more stitches or rows than the instructions say you should have, your work is a little too tight, and if you've got less your work is too loose. Adjust your tension by holding the yarn a little more tightly/loosely as you crochet.

💪 Remember learning a new skill can be a little challenging at first, and you’re bound to find yourself making some mistakes along the way. But as with learning anything, your brain and your hands slowly start to get the hang of it, muscle memory is created, and soon the thing you found tricky/daunting/scary is like second nature!

🧶 Happy hooker, let's crochet!
Time to switch off. Stitch on. And whip up your drool-worthy bag!
We’re going to be working double-strand. That means you’ll grab the outside and inside ends of your raffia and work them together. Just be careful that your yarn doesn’t get all twisted up as you go!

BODY
STEP 1
Let's start with our foundation chain.
💭 Try to make your chain stitches as evenly sized as possible. Don't pull the loops too tight because you'll struggle to work into these loops in your first row.
Chain 101: Make sure all the ‘V’s line up and are roughly the same size.

STEP 2
In our first row we're working into the chain, so you're going to insert your hook into the 4th chain from the hook. We only skip some stitches like this when we're working into the chain. So this is the only time in this pattern that you'll go into the 4th chain.
Then do a double crochet into each stitch along the chain.
🫣 Good news, this is the hardest row to complete because working into the chain isn't as easy as working into a row. So persist and things will get easier!
💭 Your turning chain is what gives us the height to work the next row - they are very important! Without them, we'd be making a triangle!
STEP 3
Time to complete the second row - this row becomes the foundation for all other rows. Our turning chain counts as our first stitch so you're going to insert your hook into the second stitch in the row and then into every other stitch along the row. When you get to the end of the row you'll insert your hook into the top of the turning chain and do one more double crochet.
💭 Make sure your hook is going in under both bars of the stitch. Your stitches will look like ‘V’s when looking at your work from the top down.
STEP 5 & 7
In these steps, we're going to create the space for our hand hole. We do this by chaining in the middle of the row. This means we have some missing stitches in the middle.
SEWING TOGETHER
Awesome work! You've done a lot of the heavy lifting. Next, we're going to seam our bag together.
You'll fold your piece of work in half short ways. Then follow the instructions in the video below to seam the sides of your bag together.
🎬 Watch how to join vertical seams
STRAP
Use your leftover raffia to make the strap. The length of the strap is up to you. We recommend plaiting 6 x lengths of 3.5m of raffia together. We then fold the length in half so it's a double-strand strap (try saying that 5 times quickly! 🤣)
Use your darning needle to sew the strap into the inside of your bag.
TASSELS
You should have a bit of raffia left so if you want to make some tassels to decorate your bag, let's do it!
🎬 Watch how to make a tassel
D.O.N.E! You've finished your bag, well done! Epic work 🤩 If this was your first-ever crochet project or one of many, we hope you had a blast. Don't forget to share your masterpiece with us on Instagram and TikTok @cardigang_knits 💥❤️
In a bind and need a little more help?
Email us at stitchup@cardigang.com.au and we'll be able to help! Whether you're just starting out, or you've got a specific question or problem (dropped a stitch, no stress!), we're here to get you out of a bind.


