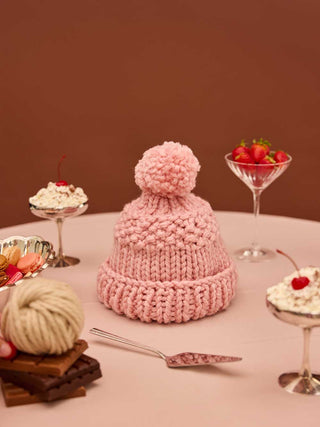
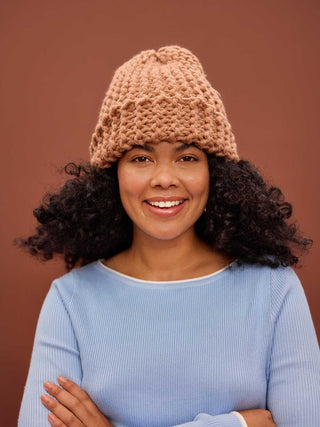
A step by step guide to knitting the gorgeous Sophia Beanie.
Ever gotten halfway through a project and thought “Hang on, am I even doing this right?”
We have 🙋♀️
That’s why we’ve created these step-by-step overviews to help guide you through the knitting process. We’ve also included videos below covering the main techniques and stitches. So head on down to the bottom of the page if you just need a quick visual reference.
THE SOPHIA BEANIE
Sophia's a gorgeous little lady with a bright smile and a soft and snug fit. Best of all? She'll keep your little noggin nice and cosy all winter.
YOUR PATTERN
Learning to knit can feel like learning code. We've stripped away the complicated jargon and tried to keep things really simple. If your head is still spinning a little, here's a handy video to help you better understand the layout of your pattern.
TEST YOUR TENSION
Before we dive in let's check that the tension is in line with what we need. We knit a swatch to make sure the tension is juuuust right. It's a bit like goldilocks, if the tension is too tight, your knit will be too small, and if it's too loose it may not hold it's shape and might be too big.
If done correctly, your 10x10cm swatch should knit 6 stitches and 9 rows.
THE BASICS
Before we get started, learn all the basics with our how to video. This one covers Casting on, 1x1 Rib stitch, Knit stitch, Purl stitch and Casting off. Once you've got these mastered you'll find this pattern is a cinch!
ONTO THE BEANIE!
We knit from the bottom up, starting at the rib and going up to the top of the beanie. The whole thing is knitted flat and we sew it together at the end.
First, we cast the required number of stitches using your 10mm circular needles. We recommend using the two needle technique. Two needle knit cast on uses your two needles (surprise!), starting with a slip knot on your left needle, each stitch is knitted to form a new loop and this loop is then added to your left needle. You repeat until you’ve made the desired number of stitches.
💡 Casting on, like many things in knitting, can be done in a number of ways - our suggestion is a simple technique but you can pick any that’s right for you.
Once you've cast on the right number of stitches you move on to the rib. We knit the rib following the instructions in your pattern.
1x1 Rib Stitch is a textured pattern usually used on the cuffs and necks of jumpers. It’s made by alternating knit and purl stitches in the same row, then knitting the same stitch in the next row. When doing your Rib Stitch it’s important to make sure your yarn is on the correct side of your needles (at the back for knit stitches and at the front for purl stitches.)
Once we've finished the allocated amount of rows, we switch to the 15mm straight needles.
💡 To switch to a different size needle we just hold the new needle in our right hand and knit onto it.
Now, to create the beanie's shape, we need to decrease the number of stitches in various rows as we knit up to the end of the beanie.
The first decrease happens at row 8. We decrease by knitting two stitches together. Knitting two together is super easy, you just stick your right needle in behind 2 stitches instead of the usual one.
Next we knit 9 rows of stockinette stitch.
Stockinette Stitch (or stocking stitch) is a basic stitch that most knitting patterns often don't explain! You create stockinette stitch by knitting one row and purling the next. This means all of your knit stitches (the little Vs) will be on the right side of your jumper.
Simple right?! 😎
From row 18 to row 26 you'll encounter more rows where we decrease stitches as we taper the shape of our knitting towards the end. Follow the instructions in your pattern.
At step 12 we cast off! You're nearly done! To cast off, knit two stitches then slip the first stitch on your right needle back over the second stitch and off the needle. You’ll have one stitch left on your right needle. Knit another stitch so you’ve got two stitches on your right needle and then slip the first stitch off. Continue to the end of the row. When you’ve got the last stitch on your right needle, cut the yarn and thread this through the final stitch to secure.
SEWING IT TOGETHER
Now it’s time to get to work with the darning needle to sew your masterpiece together. Folding your beanie in half, we're going to sew from the bottom all the way to the top using the mattress stitch technique. Once you've sewn it together you'll weave in your ends.
💡 It's normal for the wool to get a bit shabby as you go, so we recommend using a few pieces and tying them together underneath as you go!
SHAKE YOUR POM POM!
Using your handy pom pom maker it's time to make the cherry on top! Your kit comes with a strangle little circular thing - this is your pom pom maker! Grab that and the rest of your yarn and follow these steps:
Step 1: Open the pom pom maker buy pulling open all 4 'arms' - you'll have a set of two on one side and a set of two on the other.

Step 2: Wind your yarn around one of the set of arms. Wind evenly, back and forth, until the yarn is even with the straight part of the arms.

Step 3: Close the first set of arms and move your yarn to the other set of arms. Repeat the winding until that side is full too.


Step 4: Close the second set of arms and you're ready to cut! Cut along each half of the pom pom maker so your cutting down the centre of the arms and all the way around in a circle.


Step 5: Cut a pice of yarn around 20cm long. Wrap that piece of yarn around the pom pom maker in the space you just cut around. Wrap twice, the pull tightly and tie a knot.


Step 6: Pull the arms open and remove your pom pom! Give it a little trim if there are any long bits. Grab the ends of the yarn you used to tie your pom pom together and use your darning needle to secure the pom pom to the top of your beanie.

AND YOU ARE DONE! Now rock that beanie in style ✌️
VIDEOS FOR A BIT OF EXTRA HELP!
Don't worry, YouTube was our best friend when we taught ourselves how to knit.
Here are some videos that should be helpful but feel free to go searching for your own. There are a number of techniques people use for a lot of the common stitches in knitting so there's no one right way.
Find what works for you! If you get stuck, reach out to us and we'll give you a hand! 😎
Testing your gauge
Casting On
Knit Stitch
Purl Stitch
1x1 Rib Stitch
Stockinette Stitch
Decrease a stitch
Casting Off
Sewing together


