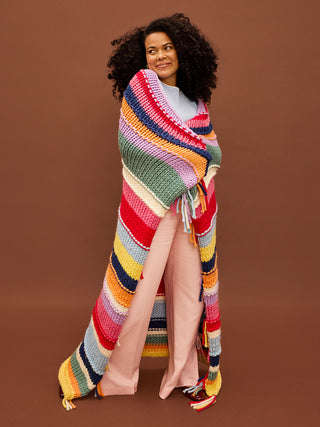
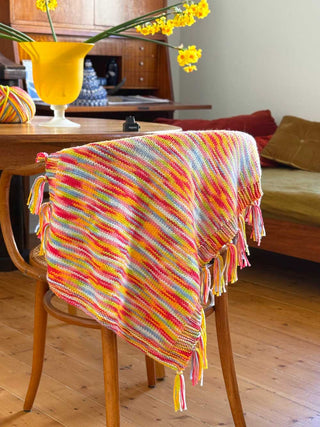
A step by step guide to knitting the cosy Lucky Dip Scarf.
Ever gotten half way through a project and thought “Hang on, am I even doing this right?”
We have 🙋♀️
That’s why we’ve created these step by step overviews to help guide you through the knitting process. At each stage we’ll show you how each section of your piece should look, and at the end, how to sew it all together. Voilà!
THE BASICS
If you're a total knitting newbie - WELCOME! Learning to knit can feel like learning code. We've stripped away the complicated jargon and tried to keep things really simple. 🧶
Before we get started on the pattern it’s a good idea to learn the basic stitches you’ll need to complete your masterpiece. You can use the yarn that came in your kit to practice with, just be gentle with the yarn - it’s super fine so will break if it’s worked too hard or too many times. We’ve put the below video together to cover the basics. Learn how to cast on, do a knit stitch, a purl stitch and put them together to create a 1x1 rib stitch, lastly we learn casting off. Once you've got these mastered you'll find this pattern is a cinch!
💭 For more detailed videos of each technique, head down a little further where we've got specific videos for each stitch type.
🏅🧶 You got this! ⚡️💪
Remember learning a new skill can be a little hard at first and you’re bound to find yourself making some mistakes along the way. But as with learning anything, your brain and your hands slowly start to get the hang of it, muscle memory is created, and soon the thing you found tricky/daunting/scary is like second nature!
If you get stuck, reach out to us and we'll give you a hand! 😎
TEST YOUR TENSION
It’s a good idea to check that the tension (how tightly or loosely your knitting is) is in line with what we need. We knit a “tension swatch” to make sure the tension is juuuust right. It's a bit like goldilocks, if the tension is too tight, your jumper will be too small, and if it's too loose it may not hold it's shape and might be too big.
If done correctly, your 10x10cm swatch should knit 7 stitches and 9 rows. To test this, jump on your needles, cast on around 10 stitches, then knit around 10 rows. Then get a measuring tape and measure out 10x10cm and count your stitches and rows to make sure you're knitting at the correct tension.
MEASUREMENTS
Lying flat your scarf will measure 160-180cm long by 27cm wide.
WHAT YOU’LL NEED
Your kit comes with everything you need to knit your masterpiece.
- A set of 15mm needles (straight or circular)
- 600 grams of Chunky Merino Wool
- Darning needle - this is used to weave in loose ends
THE TECHNIQUES YOU’LL MASTER
CASTING ON
We recommend using the two needle technique. Two needle cast on uses your two needles (surprise!), starting with a slip knot on your left needle, each stitch is knitted to form a new loop and this loop is then added to your left needle. You repeat until you’ve made the desired number of stitches. To see casting on in action watch our "Master The Basics" video above.
💭 Casting on, like many things in knitting, can be done in a number of ways - our suggestion is a simple technique but you can pick any that’s right for you.
KNIT STITCH
This handy little stitch makes up the backbone of most knitting patterns. Each knit stitch looks like a little ‘v’.
PURL STITCH
The second most common stitch, purl stitches look like little bumps (or purls!). Where you knit a knit stitch with your yarn tail at the back of your work and your needle going into the back of the stitch, the purl is the opposite, so your yarn tail is at the front of your work and your needle goes into the front of the stitch.
GARTER STITCH
This simple stitch is created when you knit every row. Easy! And the best part? It’s reversible, as there’s really no right or wrong side.
RIB STITCH
1x1 rib stitch is a textured pattern usually used on the cuffs and necks of jumpers and the end of scarfs. It’s made by alternating knit and purl stitches in the same row, then knitting the same stitch sequence in the next row. When doing your rib stitch it’s important to make sure your yarn is on the correct side of your needles (at the back for knit stitches and at the front for purl stitches). To see rib stitch in action watch our "Master The Basics" video above.
CASTING OFF
To cast off, knit two stitches then slip the first stitch on your right needle back over the second stitch and off the needle. You’ll have one stitch left on your right needle. Knit another stitch so you’ve got two stitches on your right needle and then slip the first stitch off. Continue to the end of the row. When you’ve got the last stitch on your right needle, cut the yarn and thread this through the final stitch to secure. To see casting off in action watch our "Master The Basics" video above.
OKAY, LET’S KNIT UP A STORM!
You'll have a few different colours of yarn in your kit and you'll use all the wool in your kit, changing colours when you've got approximately 50cm left in the working ball. Depending on your preference, you can knit up the full amount of one colour before moving into the next or you can do multiple bocks of the one colour - it’s your masterpiece, go crazy!

STEP ONE: CASTING ON
Okay, so first we need to get our stitches onto our 15mm needles. Do do this we use a method call "casting on". We start with a slip stitch and then knit the stitches onto your left needle. The video above demonstrates this.
STEP TWO: RIB STITCH
Time to dive into the rib stitch. We'll knit 6 rows of rib stitch. Remember, you need to move the tail of your yarn from the back to the front between each stitch to get that ribbed pattern.
STEP THREE: GARTER STITCH
Now we're going to do a garter stitch, which is easy peasy! Knit every row and change your yarn as you like. We recommend changing colours at the end of a row, not the middle. This will keep your piece neat. To change colour just tie the new colour around the end of the old colour and start knitting with your new colour. You can tighten the knot at the end and then weave in the loose ends with your darning needle.
STEP FOUR: RIB STITCH
To make sure the ends of our scarf are even, it's time to finish off with a rib stitch. You’ll need around 12 meters (or 30-40 grams) of wool left to complete this part so make sure you factor that in as you knit.
Complete 6 rows of rib stitch.
CAST THAT BABY OFF
HOORAY! YOU'VE MADE IT!
It's time to cast off your stitches and weave in the loose ends. You. Are. Done.
We'd 💕LOVE💕 to see how you go! Share your masterpiece with us by tagging @cardigang_knits on Instagram or by sending us an email at hello@cardigang.com.au
Until next time! 😘🧶
Morgan & Cat xx


