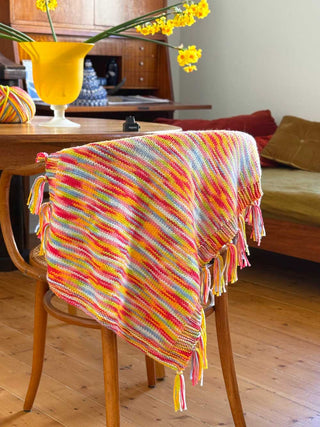
A scarf is the perfect first project to dip your toe into crochet!
A scarf is a great way to learn all the basics of crochet whilst making a cosy accessory that you can wear with pride all winter long 🧣
Don’t know how to crochet? No worries! We will help you become a crochet wizard in no time. Just grab your hook, yarn and follow along to make the perfect crochet scarf.
STEP 1
Choose Your Yarn
The type of yarn you pick for your scarf can have a big impact on how it looks and feels.
Picking out yarn is one of our favourite parts of starting a new project. You have the opportunity to pick a fibre as well as colour palette that fits your vibe! Feeling bold? Why not go for something bright and chunky. Feeling like you want to be a little more luxurious? How about mohair! Feeling like you want to be more casual and cosy? How about navy or beige. The world is your oyster with this crochet scarf 💕
💡Tips for picking out your yarn fibre:
- For those who are looking to create a scarf to keep it warm and cosy during the winter months, natural fibres such as cashmere, alpaca, merino wool, mohair, or cotton are the perfect choice.
- For those who are wanting a heavier duty scarf perfect for the rough and tumble of winter sports, a yarn with some polyester or acrylic is a great choice.
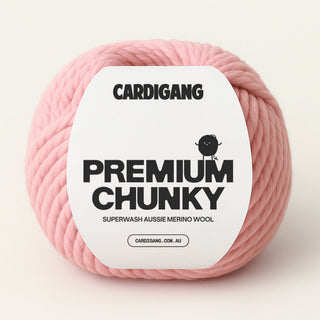
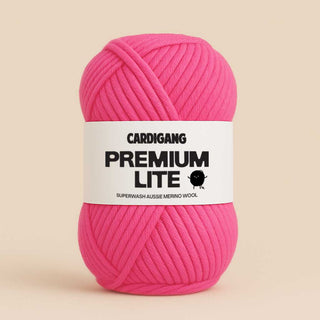
Here at Cardigang, we use 1100% Aussie Merino wool, Chunky Mohair yarn and Chunky Cotton yarn in our crochet kits 🧶
Our Merino wool is the perfect choice for those wanting to crochet a chunky and cosy scarf to bundle up in. For those feeling a little more lavish, our Chunky Mohair is the perfect yarn to add a little extra luxe to your winter wardrobe.
STEP 2
Select your Hook Size
What hook size you use will determine how large your stitches will be.
A 6.5mm hook will create a much smaller stitch than a 10mm hook. What size hook you use is totally up to you.
💡Our crochet kits come with the options of adding in the correct size hook for the pattern you're making. New to crochet and feeling a little overwhelmed? Why not try out the Bonnie Crochet Scarf kit.
STEP 3
Determine your Gauge
Now that you’ve picked your perfect yarn and hook, it’s time to determine your gauge!
The gauge is how loosely or tightly you crochet and will impact how many rows and stitches you will need to complete your project.
It is great to get into the habit of measuring your gauge before starting any new project to ensure you get the sizing correct. There is nothing worse than coming to an end of a project and realising it's the perfect size for your old polly pocket doll and not yourself!
To measure your gauge, simply crochet a 10cmx10cm square with the hook and yarn you plan to use for your project.
Count the number of stitches and rows in the square so that you can accurately calculate how many chains you will need before starting your scarf.

💡 Using a crochet kit means that you have the right size hook, correct amount of yarn and easy to follow instructions that will help you create the perfect crochet scarf. We’ve taken all the guesswork out of it so you can start your project with confidence!
STEP 4
Start your Chain
The chain is the foundation for your crochet scarf. To start, you’ll need to make a slip knot and make your chain from there.
To make a chain you’ll want to start with a slip knot.
To make a slip knot:
- wrap your yarn twice around your index finger.
- Grab the back loop and pull it over top of your second loop.
- You’re then going to grab that second loop and pull it all the way over your finger.
And now you have a slip knot! Insert your hook into your slip knot!
To chain:
- Use the yarn that is still attached to your ball and yarn over your hook.
- Twist your hook and slip it through the loop, you have now chained one.
- Continue these steps until you have the correct amount of chains you need for your scarf.
How long your chain is will determine the width of your scarf - so make sure you have measured your gauge and have made the correct amount of chains!
💡Make sure your chain isn’t too tight, if it’s feeling a little sticky/stiff and you’re finding it hard to move your hook through your chain, unravel and start again. A tight chain will make it difficult to work your crochet stitches and will create a tighter gauge that might give your project a funky shape that we don’t want!
STEP 5
Time to Crochet!
Woohoo! It’s time to get that hook to work!
There are a couple of different crochet stitches to choose from. If you’re new to crochet we recommend starting out with a single crochet stitch. It’s a great first stitch to help build up your confidence.
To start your single crochet stitch you’re going to want to:
- skip the first chain from your hook and insert your hook into the second stitch of your chain.
- You’re then going to yarn over and pull that yarn through your chain. You now will have two loops on your hook.
- You’re then going to yarn over and pull that loop through the two loops on your hook.
And just like that, You’ve completed your first single crochet!
Follow steps 1-3 for each stitch on your chain until you reach the end, and there you have completed your first row!
When you finish your first row, you’re going to want to start a new row of single crochet. To do so, you’re going to:
- Chain one (this will help you create a nice clean edge to your project)
- Turn your work and insert your hook into the first stitch of your work (do not insert your hook into the chain you just made!)
- You’re then going to follow steps 1-3 the same as above.
Don’t worry if you make a mistake - we’ve all been there! Simply unravel the mistake and start again, Rome wasn’t built in a day!
Keep repeating the steps above until you have reached the desired length for your scarf. Once there, you’re going to want to fasten off your crochet.
Already know how to single crochet and want to further challenge yourself? How about trying out a new stitch. Check out our Learn how to Crochet Youtube playlist for more tutorials!
STEP 6
Fasten off
You're almost at the end! 🍷
To fasten off your scarf, you’re going to slip your hook out of your loop, you’re going to grab a pair of scissors and cut the yarn that is attached to the ball, leaving enough yarn to thread into your scarf.
You’re then going to thread that tail through the loop to create a knot. Give it a tug to secure it.
STEP 7
Finishing Touches
Congratulations! You’ve made it to the end 💪
It’s time to sew in your loose ends and block your fabric so it will hold its shape when you start to wear it.
Sew in any loose ends to your work for a seamless finish. You can do this using a darning needle or your crochet hook.
To block your work simply let it soak in warm, soapy water (ensure detergent used is yarn-friendly!) for at least thirty minutes then dry it flat.
And just like that, You’re done! Time to show off your new hand-made crochet scarf, you’ve earned it 💪🧶
Remember learning a new skill can be a little challenging at first, and you’re bound to find yourself making some mistakes along the way. But as with learning anything, your brain and your hands slowly start to get the hang of it, muscle memory is created, and soon the thing you found tricky/daunting/scary is like second nature!
Ready to dive into a fully-kitted up Crochet Kit?
Our kits come packed with all the goodies you need to crochet a masterpiece – incredibly easy to follow instructions, the perfect amount of wool & hook all ready for action.


