


A step-by-step guide to crocheting the Show-stopping PIA Cardigan
Ever gotten halfway through a project and thought “Hang on, am I even doing this right?” We have 🙋♀️
That’s why we’ve created these step-by-step guides to walk you through the crochet process.
Even if you've never crocheted before, we'll take you from zero to hero in no time 🦸♀️
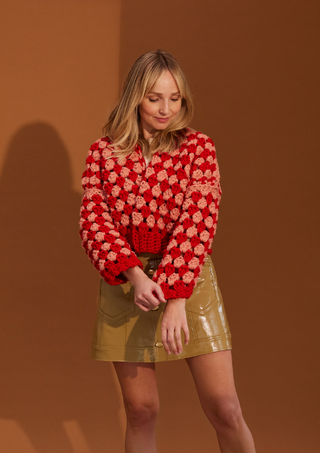
THERE’S NO TWO WAYS ABOUT IT, PIA IS A SHOW-STOPPER. EASY TO CROCHET AND FEATURING A DISTINCTIVE POLKA DOT PATTERN, HER CUTE CROPPED STYLE WILL KEEP YOU SNUG AS A LADYBUG AND HAVE PEOPLE STOPPING YOU TO ASK “WHERE’D YOU GET YOUR KNIT FROM?”.
When it comes to crochet, practice makes perfect 🏆
Before we start the pattern, we suggest you spend some time learning the basic techniques you’ll need to complete your masterpiece 🤓
The Pia Cardigan is a dream to whip up and a great challenge for beginner crocheters! She's made using a combination of single-crochet and double-crochet stitches. You'll want to be confident with these stitches before we start. You'll also want to get a hang of tying a slip knot and chaining which is the first step in any crochet project.
You can use the yarn that came in your kit to practice with. Once you've got these mastered you'll fly through your project.
Total beginner? 👩🏫
For a more comprehensive lesson on the basics of knitting visit our Learn How To Knit page.
Onto the Cardigan!
⚡️What you'll need
Your kit comes with everything you'll need to make your masterpiece. In your kit you'll find;
- 9mm & 10mm hook
- 11-16 balls of Cardigang Chunky Acrylic yarn
- A darning needle
- Made by me tag
You also want to have a pair of scissors handy.
📏 Sizing and measurements
You can make your Pia Cardigan in six sizes.
| SIZE |
MEASUREMENTS (laying flat) |
| 1 (AUS 6-8) (USA 2-4) | 65cm wide x 44cm high |
| 2 (AUS 10-12) (USA 6-8) | 70cm wide x 48cm high |
| 3 (AUS 14-16) (USA 10-12) | 75cm wide x 52cm high |
| 4 (AUS18-20) (USA 14-16) | 80cm wide x 56cm high |
| 5 (AUS22-24) (USA 18-20) | 85cm wide x 56cm high |
| 6 (AUS 26-28) (USA 22-24) |
Your pattern is read like this; 1 (2, 3, 4, 5, 6). Make sure you're following the correct instructions for your size.
🥣 Test your tension
While we're practising and before you start your project, you'll want to make sure your tension (how tightly or loosely your crocheting is) is juuuust right 🥣 We do this by making a “tension swatch”. It's a bit like Goldilocks, if the tension is too tight, your piece will be too small, and if it's too loose it may not hold its shape and might be too big.
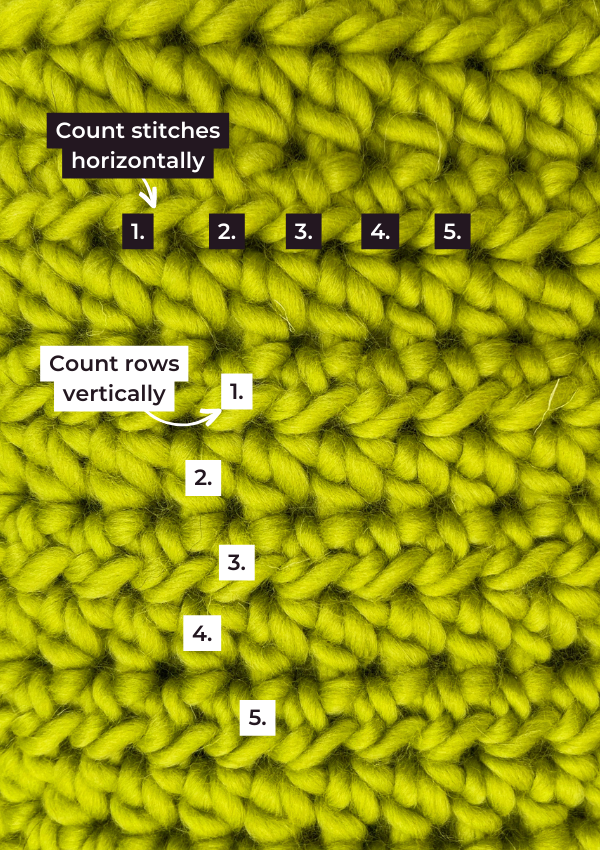
Gauge: If done correctly, your 10x10cm swatch should be 8 stitches wide and 4.5 rows high when made in double crochet on your 10mm hook.
To test this, grab your hook and chain on 10 + 3 stitches (the +3 makes your turning chain), then work in double crochet for 6 rows. Then measure a 10x10cm square and count your stitches and rows within that space to make sure you're crocheting at the correct tension.
If you've got more stitches or rows than the instructions say you should have, your work is a little too tight, and if you've got less your work is too loose. Adjust your tension by holding the yarn a little more tightly/loosely as you crochet.
💡 We know making a tension swatch can seem like a bit of a drain, but it's really important because the difference of a few millimetres in your tension can lead to a finished piece this is quite different in size to what you intended.
GET READY TO SWITCH OFF. LET'S DO THIS 🧶
Remember learning a new skill can be a little challenging at first, and you’re bound to find yourself making some mistakes along the way. But as with learning anything, your brain and your hands slowly start to get the hang of it, muscle memory is created, and soon the thing you found tricky/daunting/scary is like second nature! 💪
THE BACK

We start with the back piece which we crochet flat from the bottom rib up to the shoulders. This is the biggest piece of your cardigan and once done it will look like a big rectangle.
Step 1-4: RIBBING
To start, chain on your foundation chain using your 9mm hook.
We make our rib vertically so you'll be making one long skinny strip.
💭 Try to make your chain stitches as evenly sized as possible. Don't pull the loops too tight because you'll struggle to work into these loops in your first row. On the other hand, if you make your loops too loose, your project will look a little messy.
Row 1:
Once you've chained, you'll move on to the first row of single crochet.
Row 2 onwards:
Continue doing single crochets. We're working just into the back loop. By doing this we create the 'rib' effect in our work. You'll need to make sure that you're putting your hook into the back loop of your stitches and not under both loops (bars) of the stitch.

Step 5-8:
Excellent work, the ribbing is done. Now we’re going to work up the rest of the back panel in granny stripe and using our 10mm hook. Granny stripe is created when we create clusters of double crochet.
You'll see the pattern instructs you to do multiple double crochets into the one space. This creates a cluster. We then work on the spaces between clusters over each row.
One of the best things about the granny stitch is its simplicity. Once you get the hang of it, the pattern becomes almost meditative, allowing you to relax and enjoy the rhythmic flow of crochet.
🎬 WATCH HOW TO DO A GRANNY STRIPE
ROW 1
WE'RE GOING TO WORK INTO THE LONG EDGE OF THE RIB NOW, SO MAKE SURE THE RIB IS SITTING LONGWAYS AND YOU'RE WORKING INTO THE TOP OF THE RIB PIECE. WE'RE GOING TO WORK UP THE BACK PIECE NOW.
COMPLETE YOUR DOUBLE CROCHET STITCHES INTO THE SPACES INDICATED IN THE PATTERN. REMEMBER YOU'RE CREATING CLUSTERS NOW SO YOU'LL BE DOING MULTIPLE STITCHES INTO THE SPACE.
ROW 2
CHANGE TO COLOUR 2. TO CHANGE COLOURS YOU'LL TIE THE NEW COLOUR TO THE OLD WITH A KNOT AND BEGIN WORKING WITH THE NEW COLOUR.
📹 WATCH HOW TO CHANGE COLOURS
ROW 3 ONWARDS
CONTINUE FOLLOWING THE PATTERN TO KNIT UP YOUR BACK PANEL IN GRANNY STRIPE.
💭 One of the things we found the hardest when we were learning to knit was keeping track of our rows. Before we were able to easily identify a row of stitches we used a pen and paper to keep track. That's why we've included handy circles in our patterns - you can tick them off as you go. The dashed circles are for the larger sizes.
Fasten off and that's the back piece done!
🔥 NICE WORK! THE BIGGEST PIECE OF YOUR cardigan is done!
DID SOMEBODY SAY WINE TIME?! 🍷
THE FRONT PIECES

The good news! The front panels are made using the same techniques as the back so these will be a cinch now! 😎
THE SLEEVES

You're flying through this! We make the sleeves from the bottom up - just the same as we've been doing for the other pieces.
You can think of the sleeves as another version of the front panels.
Seaming IT TOGETHER

Yes legend, you've (almost) made your bomber! 🕺
At this point, you'll have 5 lovely pieces of crochet handiwork.
There are two choices for joining your pieces. You can use your crochet hook and slip stitch the pieces together, or pick up your darning needle and sew the pieces together - this is the method we've used in the pictures.
OPTION 1: Slip stitch (crochet hook)
To slip stitch your pieces together you'll start with the horizontal seams.
🎬 Watch How to horizontal seam
Then join the sleeves and seam the sides using the vertical seams method.
🎬 Watch How to vertical seam
💡Make sure to work the slip stitches loosely so that the piece remains stretchy.
FINISHING
The last thing we do for every piece is weave in the ends. That’s basically just tidying up the piece so all loose ends are trimmed down and tucked into the inside of your work. You use your darning need and weave those ends into the seams so they are nicely hidden away.
BLOCKING (OPTIONAL)
The final step in finishing a knitted piece is to block it. This step is optional and not all beginner knitters will block their work (we didn't! 🤣) but it can improve the overall shape and finish of your piece.
Blocking your knitting is a process where you wet your piece to set the finished size and even out the stitches.
You can choose to block your work before you seam it together, or after. If you block before seaming together you might get a better result with your seaming because the stitches will be more lined up.
Step 1
Soak your knit in cool water. You only need to let your piece sit in the water for a few minutes and make sure the full piece is completely wet.
Step 2
Remove your knit from the water and dry it off by rolling it in a towel. You want to get us much of the moisture out of the knit as possible at this point but be gentle! You don't want to stretch the knit.
Step 3
Transfer your damp knit to a flat surface to block it on. If you've got a blocking mat - great! otherwise a towel will work. The surface needs to be somewhere where your knit can lie flat and can stay there until it fully dries so that the shape sets properly. Make sure it's not a surface that can be easily damaged by having something wet sitting on it!
Step 4
Arrange your piece so the right side is facing up and the shape is as you'd like it. If you've got a measuring tape you can measure and adjust the piece so it's the correct size.
Step 5
Allow the knit to air dry - this can take a few days. You can also use a hair dryer to speed up the process, just use a light heat and don't concentrate the air in one spot.
D.O.N.E! You've finished your cardigan, well done! Epic work 🤩 If this was your first-ever crochet project or one of many, we hope you had a blast making your masterpiece 💥❤️
In a bind and need a little more help?
Email us at stitchup@cardigang.com.au and we'll be able to help! Whether you're just starting out, or you've got a specific question or problem (dropped a stitch, no stress!), we're here to get you out of a bind.