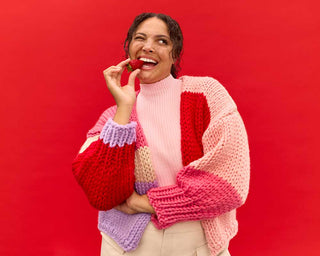
Learning to knit doesn't need to be hard. Go from zero to knitting hero with CARDIGANG!
Your new hobby starts here. Zero experience? Zero stress.
Welcome to your one-stop stitch shop. Whether you’re here to calm your chaos, flex your creative muscles, or finally tick “learn to knit” off your list — we’ve got you. This guide will walk you through everything you need to know to get started with confidence (and a few compliments along the way).
When you first look at a knitting pattern it can be pretty overwhelming, but here’s a little secret. You really only need to learn two stitches and you can knit basically anything! So strap in and let's learn to knit 💪
QUICK LINKS ⚡️
1. What You Need to Get Started
Before we knit, let’s kit. Here are the basic items you'll need to begin knitting.
🧵 Supplies
- Yarn (Start with chunky yarn — it’s beginner gold)
- Needles (We love 12mm – 15mm for your first project)
- A pattern (Our kits come with one!)
- Scissors
- A darning needle for finishing
👀 Not sure what to buy? Our beginner kits include everything — yarn, needles, pattern, and step-by-step support.
2. Knitting Basics: Stitch Explainer
Okay, before we pick up the needles it's helpful to know a bit about the types of stitch patterns we'll learn to make.
Most beginner patterns will use a combination of knit and purl stitches to create the garter stitch, stockinette stitch and rib stitch patterns.
Garter stitch
Garter stitch is a great beginner stitch because it's as simple as it gets. It's made when you knit every stitch in every row. It creates a stretchy fabric that is the same on both sides.
Stockinette stitch
Stockinette stitch creates what's commonly known as 'knit fabric'. It's created by knitting all the stitches in one row, then turning your work and purling all the stitches in the next row. When created, the 'front' side of your work will look like it's made up of a series of V's, while the 'back' side will look like little waves or ridges.
Rib stitch
A rib stitch is a textured pattern usually used on the cuffs and necks of jumpers. It’s made by alternating knit and purl stitches in the same row, then knitting the same stitch sequence in the next row.

3. How-To: Each Technique Explained
The knit and purl stitches are both created in a similar way and there’s a simple (if not slightly morbid!) way to remember the steps you need to follow; stab it, strangle it, scoop the guts out, chop its head off. Keep this in mind as we learn each technique.

SLIP KNOT
The very first step when you learn to knit is to get some stitches onto your needle. We call this 'casting on'. To cast on, we first need to create a slip knot. You’ll then use this slip knot as your first stitch and create the rest of your stitches from there. Here's how we do that 👀
CASTING ON
This is where the magic starts. You’re building the foundation for your whole project — stitch by glorious stitch.
Like many things in knitting, casting on can be done in a number of ways. We use a range of cast on techniques depending on the yarn and needles we're working with. The two-needle cast on method is the most beginner-friendly method and the one we recommend for new knitters.
KNIT STITCH
This is the stitch that started it all. Mastering this one is like learning the alphabet — it unlocks pretty much everything else in knitting.
Most of our beginner projects use the knit stitch — it’s simple, meditative, and creates that classic bumpy texture (also known as garter stitch). Once you’ve nailed this, you’re officially on your way to jumper glory.
PURL STITCH
We think of the purl stitch as knit stitch's little sister!
Purling is just knitting… backwards. Sort of. It’s the second stitch you’ll learn — and it opens up a whole new world of textures. When you alternate knit and purl stitches, you can create ribbing, stocking stitch, seed stitch, and all kinds of juicy, squishy textures.
You’ll usually use purl stitch when you’re knitting flat (back and forth) and want one smooth side and one bumpy side. It might feel fiddly at first, but trust us — it clicks quickly.
RIB STITCH
Now that you knit how to knit and purl, you can knit a rib stitch. Rib stitch is created by alternating knit and purl stitches in the same row. It’s stretchy, springy, and super satisfying. If you’ve ever worn a beanie, socks, or a fitted jumper, chances are it was rocking some rib.
The most common combo is 1x1 rib (knit one, purl one), but you can also do 2x2 rib (knit two, purl two) for a chunkier vibe.
CASTING OFF
Time to seal the deal.
Casting off is how you lock in all your hard work and get your project off the needles. It’s the final step, and trust us — few things are as satisfying as that last stitch. It’s the mic drop of knitting.
This method creates a nice, clean edge that won’t unravel and is perfect for blankets, scarves, and most of your first-time knits.
CHANGING COLOUR
When we knit, we often have a need to change the colour of our yarn - think colour-blocked jumper or striped scarf! The neatest way to change colour or start a new ball of yarn is at the end of a row. For beginners, we recommend you simply tie the new yarn in a knot around the old yarn and start knitting with the new ball. Super simple!
4. Common Questions & Fixes
Dropped a stitch? Yarn going rogue? Don’t stress — we’ve got you.
Knitting’s got a learning curve, and that curve includes a few whoopsies. The good news? Most of them are super fixable. Here’s your beginner-friendly guide to the most common stitchy snags — and how to untangle them.
🐸 HOW TO UNDO STITCHES (AKA FROGGING)
Sometimes we need to go back a few stitches in our work. The most common reason for this is we realise a few stitches too late that we've messed up the stitch pattern and so need to go back and fix it. Undoing your work is easy enough - just be gentle and go slowly.
HELP! I HAVE TOO MANY STITCHES
It's common for beginner knitters to accidentally end up with too many stitches on their needle. Here are the two most common ways stitches are added and how to avoid making this mistake.
😵💫 I DROPPED A STITCH
Dropped a stitch? Don't fret! You can save it by following this technique.
Don’t pull or panic — breathe.
Find a crochet hook or use one of your needles.
Gently ladder the stitch back up by pulling each loop through the one below it.
Once you’re back to the top, pop it onto your needle and keep going.
🪢 MY STITCHES ARE TOO TIGHT / TOO LOOSE
Your tension is off — either you’re gripping the yarn like your life depends on it, or letting it run wild.
Fix it:
If stitches are too tight: relax your hands, loosen your grip, and try wrapping the yarn more gently.
If stitches are too loose: wrap your yarn with slightly more tension (e.g. loop it around your finger for more control).
Keep practising — tension evens out with time.
🤓 Click here to learn more about testing your gauge.
💡 Hot tip: Chunky yarn is more forgiving with tension — another reason we love it.
🙃 I LOST COUNT OF MY ROWS
You blinked and forgot if it was row 5 or 6. Classic.
How to fix it:
Count the little horizontal ridges (garter stitch bumps) or vertical Vs (stocking stitch) from the bottom up.
Use a row counter, a sticky note, or our fave: the Row Bubbles in your Cardigang pattern.
Or just fudge it a little — we won’t tell. 😉
🧥 MY PROJECT JUST LOOKS… WEIRD
Sometime things just don't look quite right and you don't know why. We've all been there! It could be extra stitches, missed stitches, or inconsistent tension. It’s all normal!
How to fix it:
Check if your stitch count matches your pattern. You might have accidentally be adding stitches or dropped some
Look for accidental yarn overs (big gaps or holes).
If it’s not too noticeable and you love it — leave it! Handmade = full of character.
☎️ Ask us for a second option. Just email us a picture of your work and we'll see if we can offer some advice. Email us stitchup@cardigang.com.au
5. Tips from the Gang
We’ve unravelled enough projects to know what not to do — so here’s what we wish we knew when we started.
🎯 1. Don’t aim for perfection — aim for progress
Your first project won’t look like it walked off a Pinterest board. That’s the point. Every wonky stitch is proof you’re learning something new.
“I kept one of my sleeves inside out for months and still wore it proudly.” — Probably Cat
🧘♀️ 2. Take breaks — your hands and brain will thank you
Knitting can be meditative, but if your fingers are cramping and you’re sweating over a purl stitch… it’s time to take five. Put the needles down, shake it out, grab a snack, and come back fresh.
🎬 3. Re-watch the videos — even on your 100th row
There’s no such thing as too many replays. Repetition is your friend. That tutorial on how to cast on? Still useful six projects in.
🧶 4. Use light-coloured yarn for your first project
Dark yarn = gorgeous but chaotic. If you can’t see your stitches clearly, you’ll be frogging more than knitting. Go light, go bright, or go home.
📝 5. Keep a tally of your rows (you will forget)
Whether it’s row bubbles, a clicker, or tally marks on the back of your hand — just trust us. You’ll thank yourself when you’re not counting 37 bumps three times in a row.
📺 6. Multitasking? Wait ‘til you’re confident
Knitting + Netflix = a vibe. But maybe don’t start that murder mystery doc while learning how to rib. Save the binge-watching for the repetitive rows.
🧵 7. Don’t be afraid to unpick
It’s not failure — it’s fibre-based self-improvement. Learning to fix your mistakes is just as important as learning to stitch. You’re not backtracking, you’re levelling up.
👯♀️ 8. Find your knit crew
Whether it’s a friend, our Facebook Group, or your nan, having someone to share progress (and mild meltdowns) with makes it all 100x more fun. Or just DM us — we love a progress pic.
💅 9. Block it. Trust us.
Blocking = the glow-up. It’s how you turn “meh” into “WOW YOU MADE THAT?” Wet it, pin it, let it dry. Game changer.
💖 10. Remember why you started
Whether you’re here for the calm, the bragging rights, or the handmade wardrobe of dreams — your reason is valid. Keep going, you’re doing amazing.
6. Ready to Stitch? Try a Beginner Kit
Well done! You've learned all the basics you need to knit almost anything 👏
Our kits come packed with all the goodies you need to knit a masterpiece – incredibly easy to follow instructions, the perfect amount of wool, sticks to click, and a totes amazing tote.


