


The perfect knitted scarf is a wardrobe must-have and it's one of the best projects to learn how to knit. Let us show you how to knit a scarf step-by-step!
Scarves are like comforters for grown adults – and we’re all for it. Knitting a scarf is a great way to learn the basics of knitting and create a beautiful, cosy masterpiece. Whether you're a complete beginner or have some experience, this guide will help you knit the perfect scarf 🧣
Don't know how to knit? Neither did we! But knitting a scarf doesn't have to be intimidating – with these tips and tricks, and the right tools (🍷) you'll be on your way to crafting the perfect scarf in no time.
STEP 1
Choose Your Yarn
The type of yarn you pick for your scarf can have a big impact on how it looks and feels.
Select soft, lightweight yarns such as cashmere, alpaca, merino wool, or cotton for softer scarves that are perfect for keeping warm during those cold winter months. For more resilient scarves that won’t pill easily try choosing heavier yarns such as acrylics or polyesters.
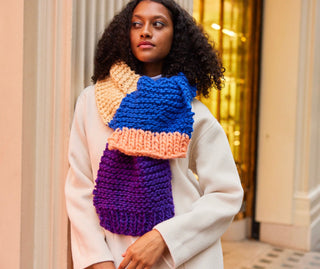
At Cardigang our kits use 100% Aussie Merino wool for a super soft and chunky finish. Or for something equally cosy and a little more luxe, try our Chunky Mohair yarn. Both yarns knit up quickly and will give you a 'wrap me up baby' feel.
STEP 2
Determine Your Gauge
Knowing your gauge will help you determine how many stitches you need to cast on and how wide your finished scarf will be.
The gauge refers to how tightly or loosely you knit and therefore, how many rows and stitches should be within a 10x10cm square. To measure your gauge, simply knit up a 10x10cm square with the yarn and needles you plan to use for the scarf. Count up the number of stitches and rows so that you can accurately calculate how many stitches to cast on once you begin knitting.
💡 The beauty of working with a knitting kit is that we take the guesswork out of things by giving you wool, needles and instructions that all match perfectly and which will give you a well-proportioned scarf.
STEP 3
Cast On Stitches
Time to get those stitches onto your needle so you can start knitting.
To cast on, we first need to create a slip knot. You’ll then use this slip knot as your first stitch and create the rest of your stitches from there. You should have enough loops for the desired width of the scarf.
STEP 4
Start Knitting
Time to start click-clacking!
Once you've cast on all your stitches, it's time to start knitting! If you're a beginner, it's best to start with basic knit and purl stitches, which are easy to learn and create beautiful, textured fabrics. As you gain more experience, try experimenting with different stitch patterns, such as ribbing or cables.
So let's start with knit stitch. This handy little stitch makes up the backbone of most knitting patterns. Each knit stitch looks like a little ‘v’. To create a knit stitch, begin by inserting the right-hand needle into the back of the first stitch on your left needle, wrapping the yarn around the right needle, and then pulling it back through. You’ve now created one stitch! Keep repeating this process in every row until you’ve reached your desired length. If you make a mistake, don’t worry – just unknit and try again!
Great, now let's try a purl stitch. A purl stitch is the second most common stitch. Purl stitches look like little bumps (or purls!) and they are the reverse of a knit stitch - where with a knit stitch your needle goes into the back of a stitch, the purl stitch puts your needle through the front of your stitch.
🌈 If you want to make a multi-coloured scarf you can change colours at any point. We recommend changing your colour at the beginning of a new row. Simply secure the new colour to the old with a knot and continue knitting with the new colour.
STEP 5
Cast Off Stitches
Once you’ve finished knitting and you’re happy with how long your scarf is, it’s time to cast off.
When you're happy with the length of your scarf the last thing we do is cast off our stitches. This helps secure all of your hard work so that it won’t unravel. To do this, knit two stitches as normal, then pass the first stitch over the second stitch before slipping it off the needle. Repeat this process until there are no more stitches left on your needles. Cut your yarn, leaving a long tail, and pull it through the last loop to secure it, and your bound-off edge is complete!
STEP 6
Finishing Touches
Now all that's left to do is weave in any loose ends and block your scarf before wearing it out into the world with style!
When your scarf is finished and you’ve bound off all your stitches, it's time to weave in any loose ends and block the fabric so that it will hold its shape when worn.
To give your scarf a professional, finished look, you’ll want to weave in any loose ends. To do this, take the tail of your yarn and thread it onto a yarn or darning needle. Then weave the needle through several stitches on the backside of your scarf until it’s securely tucked away. Repeat this process with any other loose ends you may have before snipping them off close to the fabric.
Blocking helps even out any irregularities in a knitted fabric so that everything looks neat and tidy once it’s been worn or washed.
You're done! Time to wear your scarf with pride! 💪🧶
Ready to dip a toe in with a Scarf Knit Kit?
We don't do scarves by halves - we go big, bold and I Need My Sunnies RN Bright. Check out some of our bestselling scarf kits now.